TeslaMate Setup
/24 Comments/in TeslaMate/by robertjamesdavisTeslaMate is open source and completely free for everyone to use. Huge shout out to its author, Adrian Krumpf.
TeslaMate is a self-hosted data logger and visualization tool for your Tesla. This means every trip, kilowatt, state of charge, charge duration, sleep time, internal and external temperature reading…virtually anything data related is now able to be passively captured for your analysis. Data geeks, rejoice!
In this guide, I’ll walk you through the entire process of setting up TeslaMate. It’s straightforward and shouldn’t take more than 30 minutes end to end to get up and running.
Register Domain
The first thing we’ll need is a domain that will point to our TeslaMate server. I recently migrated all of my domains from Godaddy to Namesilo and can’t recommend them enough. Feel free to sign up with any domain registrar you’d like but if you wanted to check out Namesilo, make sure to use coupon code teslamate to save on your new domain.
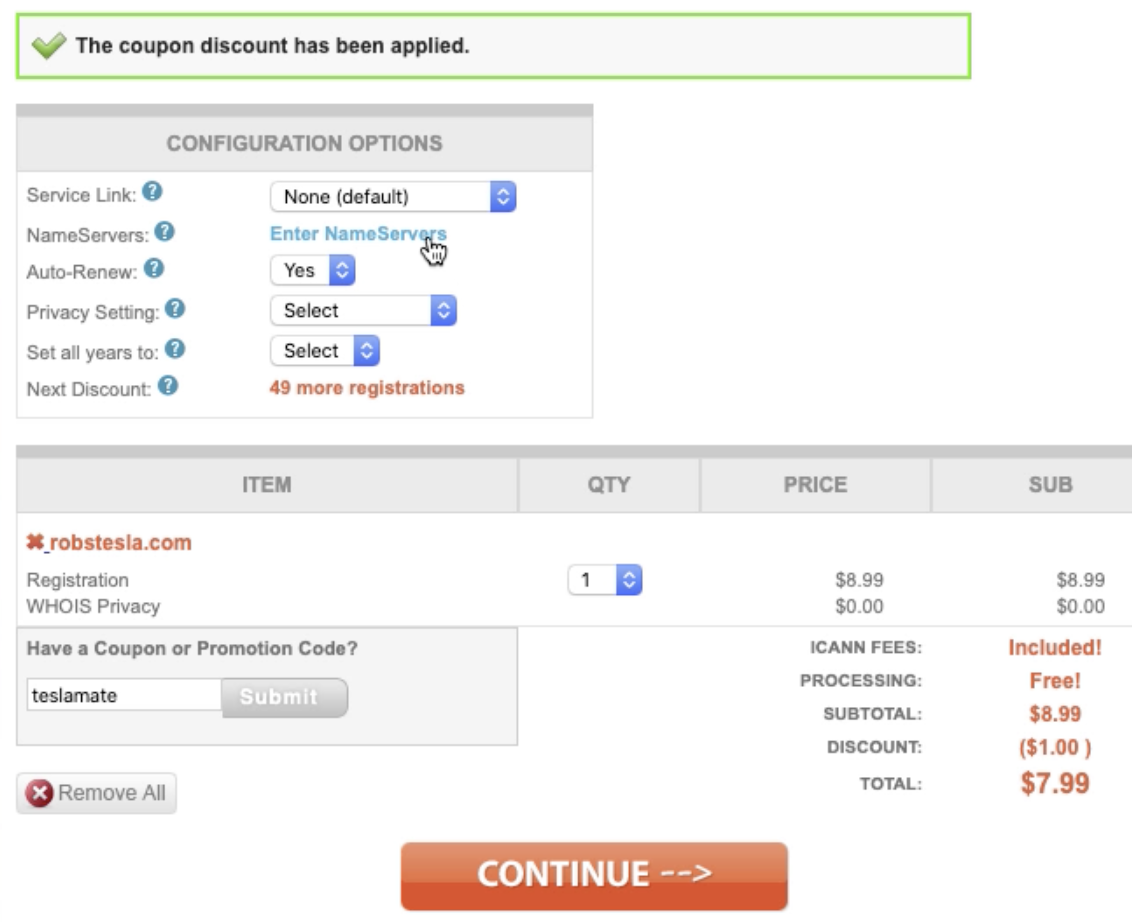
I’m purchasing robstesla.com to use for my server! The next step is to update the NameServers
Next, we need to tell our domain registrar, in this example, Namesilo, to point to the following NameServers: ns1.vultr.com and ns2.vultr.com
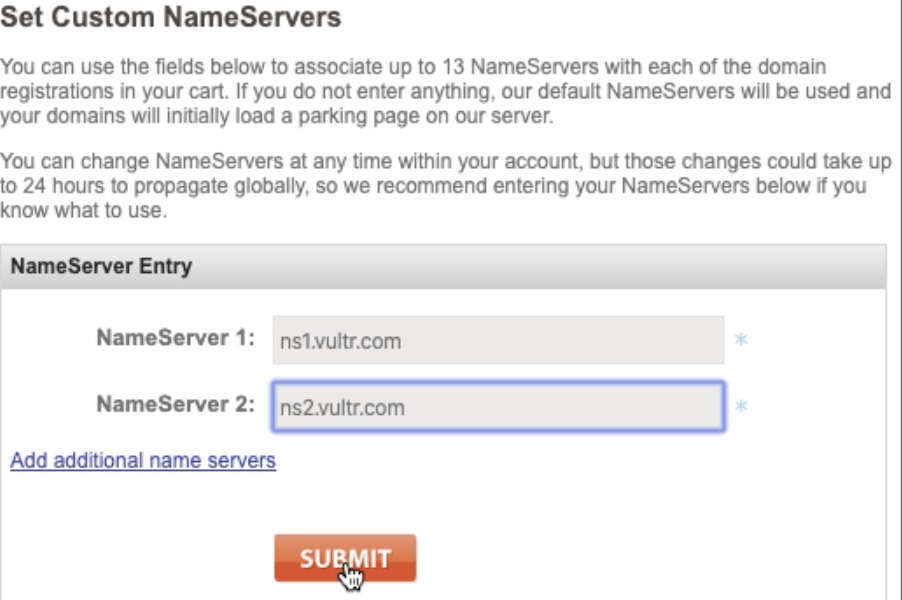
Domain secured! The next step is to set up the server.
Spin Up Server
I’m a huge fan of Vultr as they offer high performance affordable server hosting. Make sure to sign up using the button below to apply an immediate $100 account credit
Once you’re signed up, you’ll land at the Products page. The next step is to Deploy New Server

Click Deploy New Server
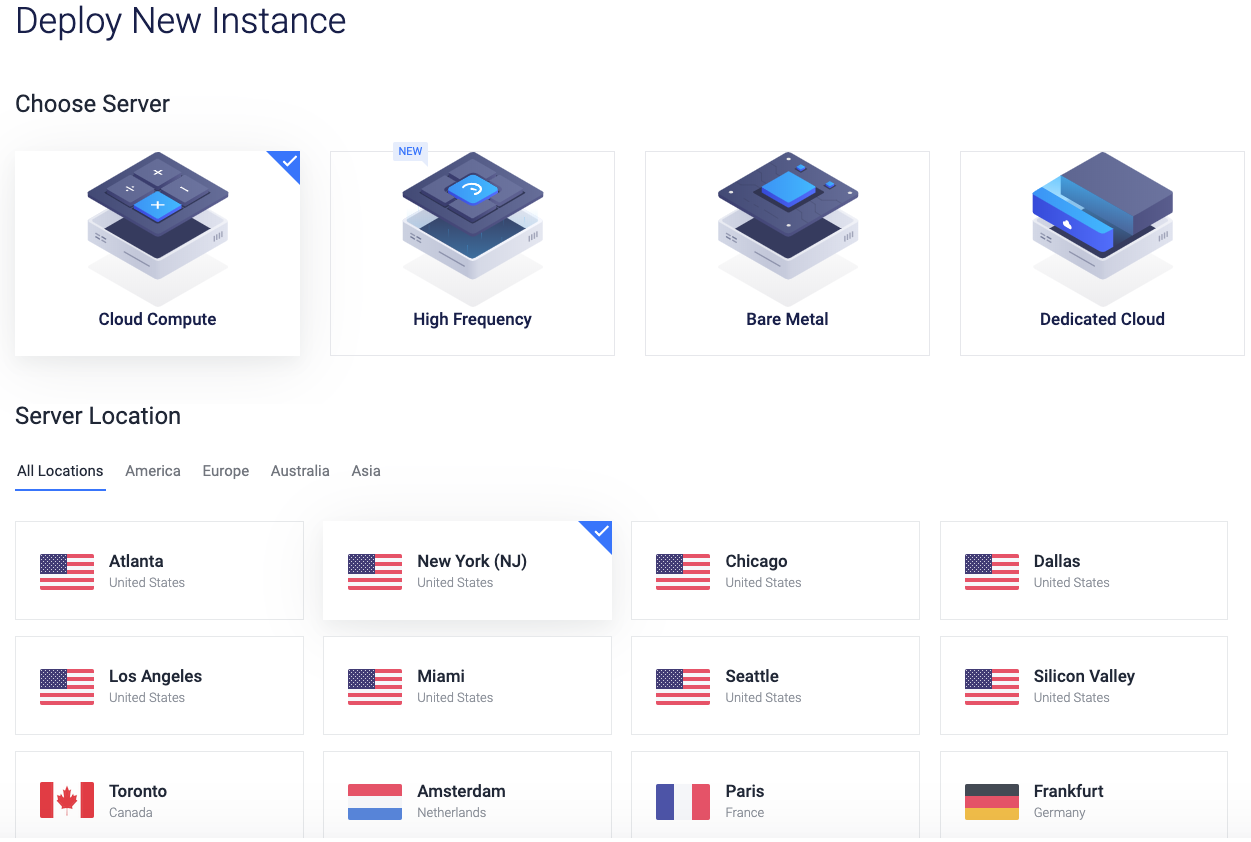
Make sure Cloud Compute is selected and choose the Server Location that you’re physically closet to
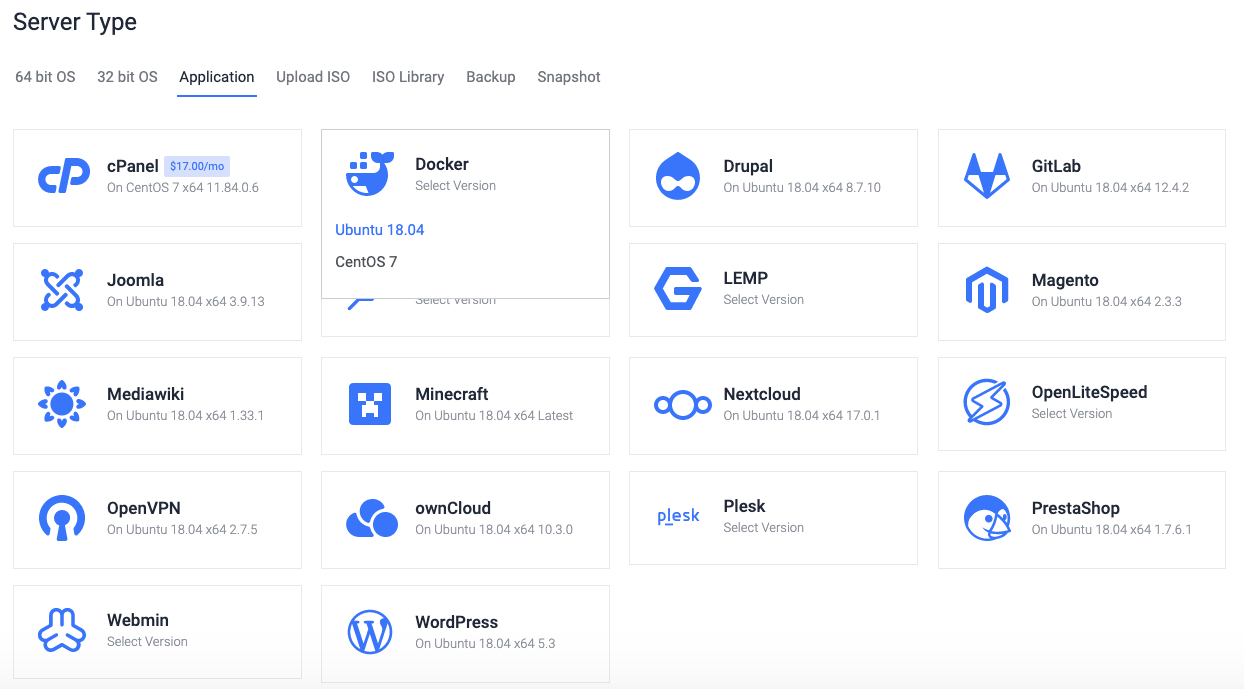
For Server Type, select the Application menu item and choose Docker with Ubuntu
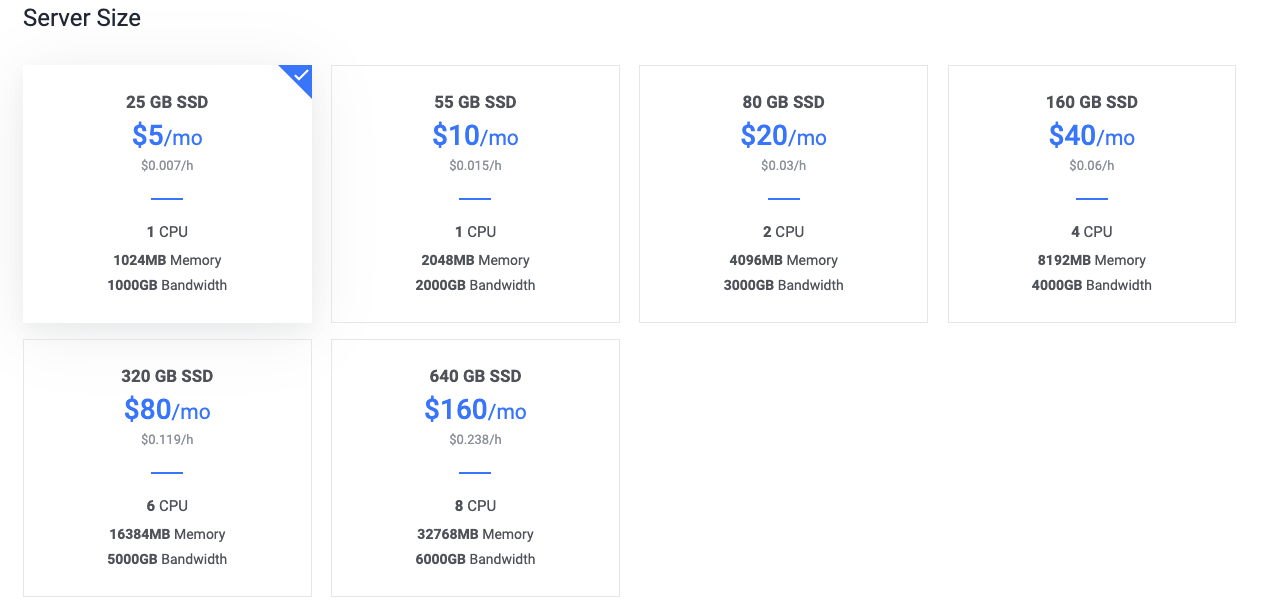
The $5/mo server should be good enough but feel free to add more horsepower and select a larger server

Give your Server a hostname (can be anything) and press Deploy Now
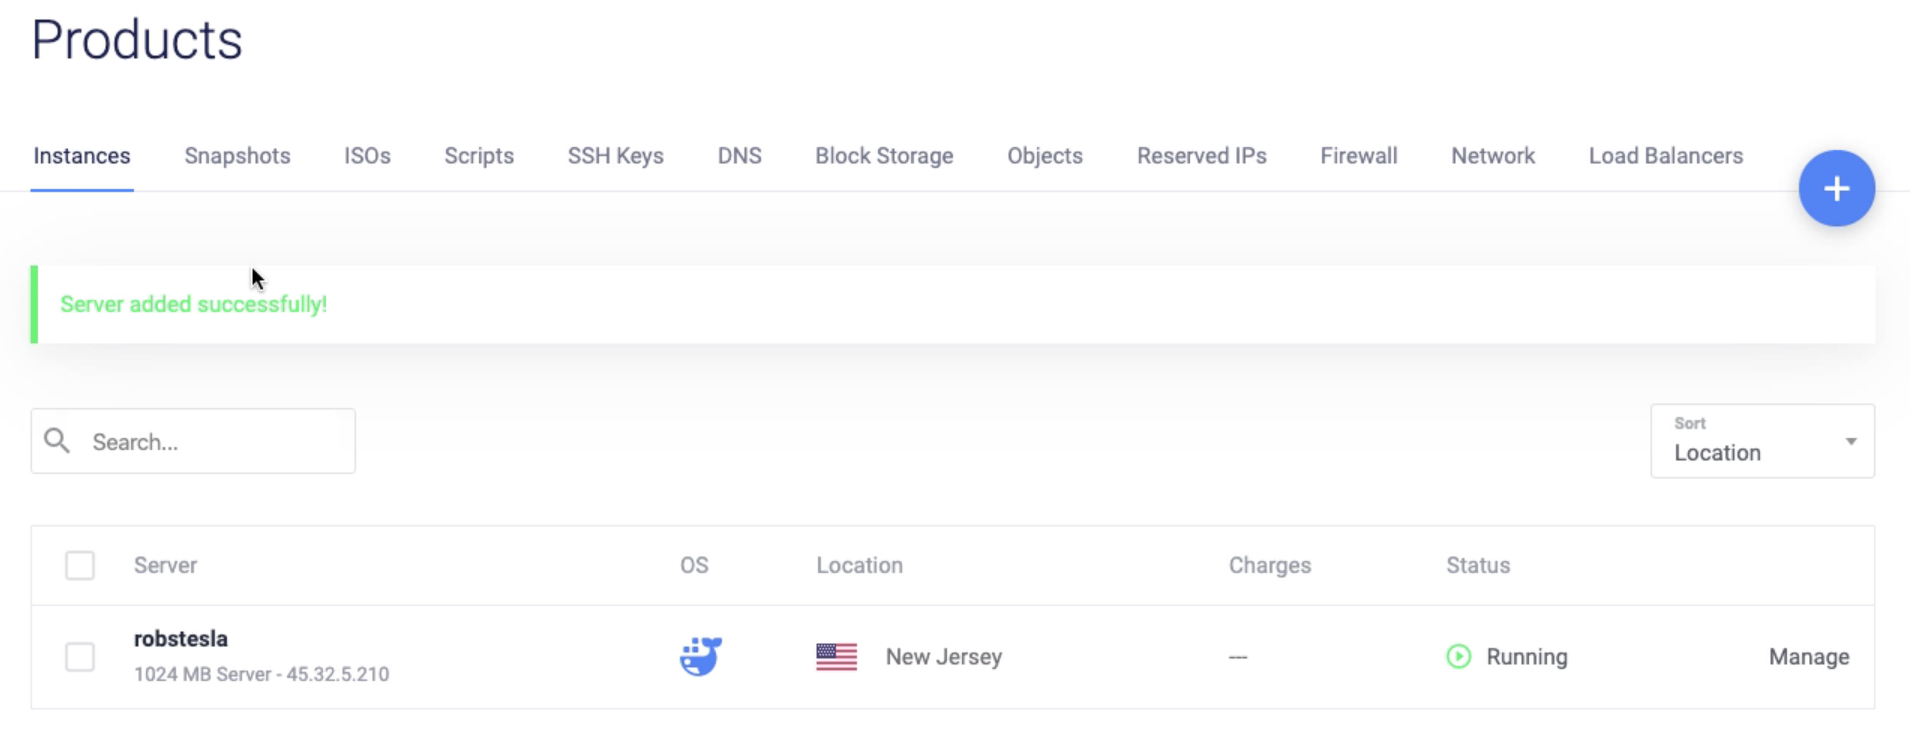
Now we wait. It shouldn’t take more than 5 minutes for your server to come online
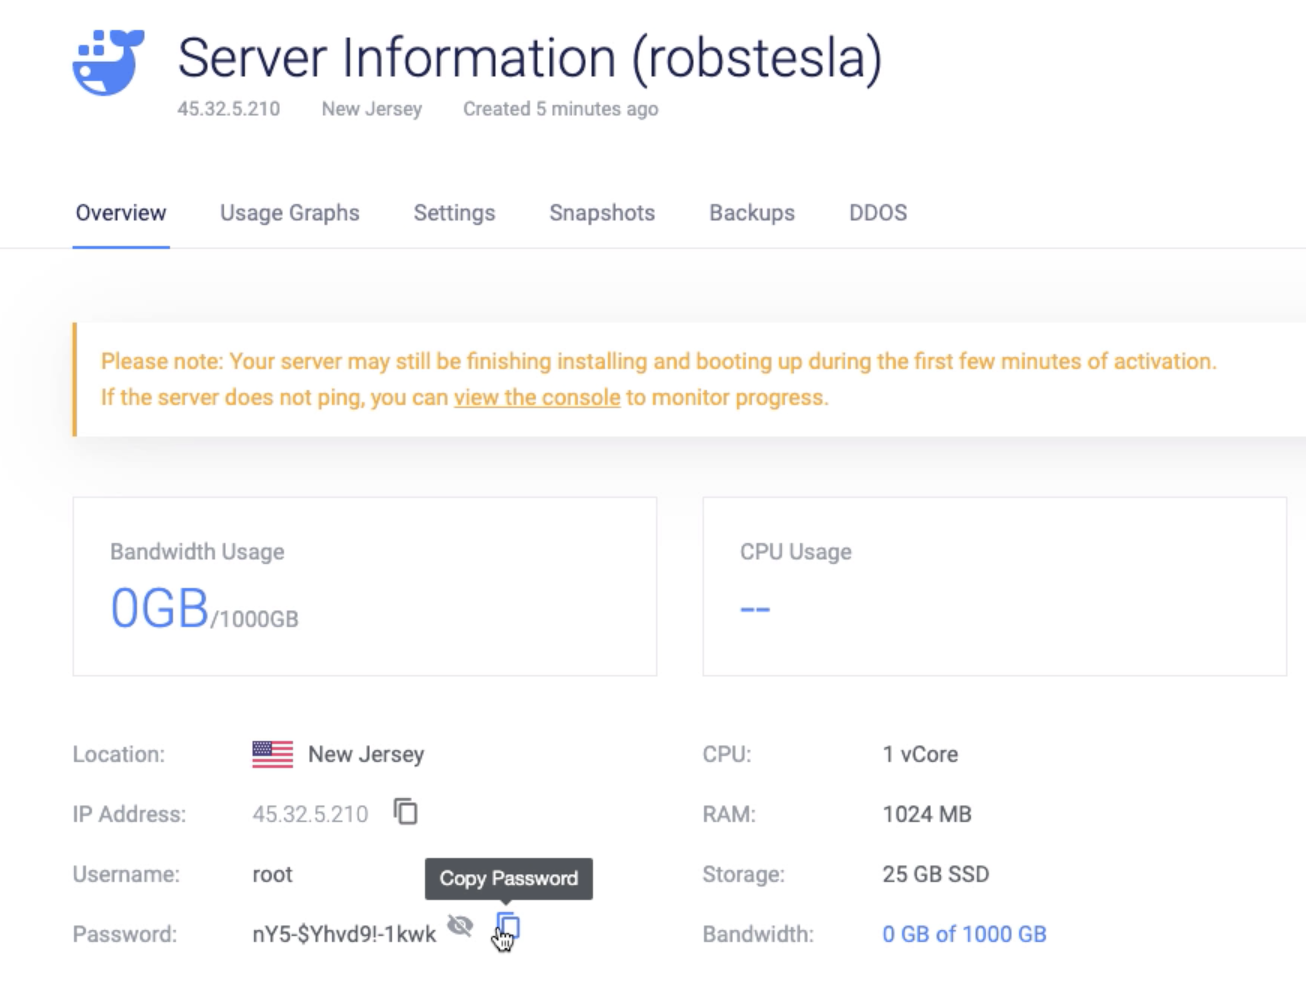
Click into your Server and press the Eye icon to reveal your root password. We’ll need to copy this password so we may SSH into our server
SSH onto your server by following the instructions for your OS
Mac (SSH)
Open the Terminal application on your Mac.

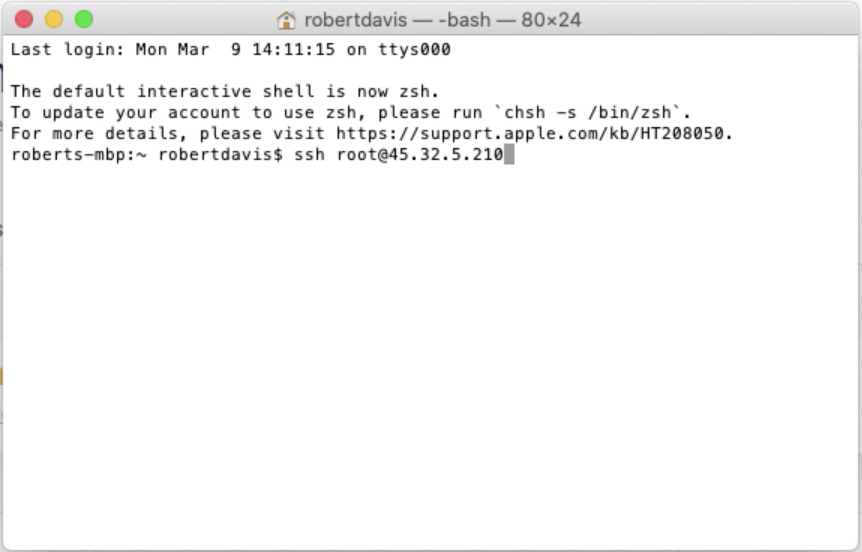
Type ssh root@your.server.ip press Enter and type yes to connect
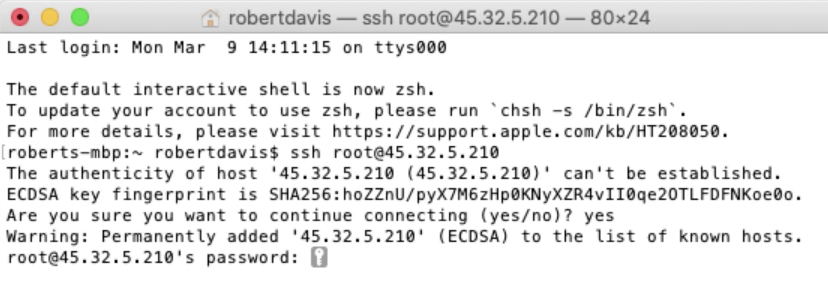
Paste in (or manually type if that’s your thing) the root password we copied from the previous step. Press enter. Next, we’ll install TeslaMate!
Windows (SSH)
If you’re on windows, download the application PuTTy.
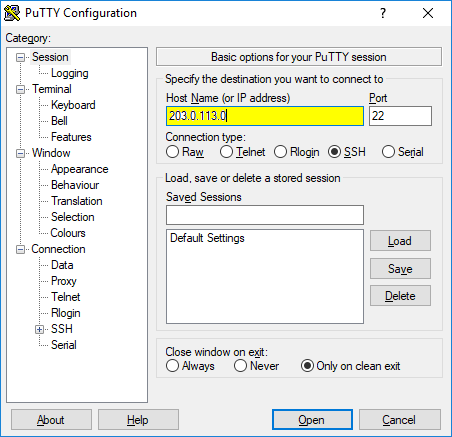
Enter your your.server.ip and Port 22. Ensure SSH is selected and press open to connect. Sign in with the root username and your root password.
Next, we’ll install TeslaMate!
Install TeslaMate
We’re going to be manually creating three files:
docker-compose.yml – The brains behind the entire install
.env – Variables used by TeslaMate
.htpasswd – Limits access to your TeslaMate server with password protection
Once you’re all logged in, type sudo nano docker-compose.yml and copy and paste the following box of code. Once it’s pasted, press control + x to exit, Y to save, Enter to save file

docker-compose.yml
version: '3'

services:
  teslamate:
    image: teslamate/teslamate:latest
    restart: always
    depends_on:
      - database
    environment:
      - DATABASE_USER=${TM_DB_USER}
      - DATABASE_PASS=${TM_DB_PASS}
      - DATABASE_NAME=${TM_DB_NAME}
      - DATABASE_HOST=database
      - MQTT_HOST=mosquitto
      - VIRTUAL_HOST=${FQDN_TM}
      - CHECK_ORIGIN=true
      - TZ=${TM_TZ}
    volumes:
      - ./import:/opt/app/import
    labels:
      - 'traefik.enable=true'
      - 'traefik.port=4000'
      - "traefik.http.middlewares.redirect.redirectscheme.scheme=https"
      - "traefik.http.middlewares.auth.basicauth.usersfile=/auth/.htpasswd"
      - "traefik.http.routers.teslamate-insecure.rule=Host(`${FQDN_TM}`)"
      - "traefik.http.routers.teslamate-insecure.middlewares=redirect"
      - "traefik.http.routers.teslamate.rule=Host(`${FQDN_TM}`)"
      - "traefik.http.routers.teslamate.middlewares=auth"
      - "traefik.http.routers.teslamate.entrypoints=websecure"
      - "traefik.http.routers.teslamate.tls.certresolver=tmhttpchallenge"

  database:
    image: postgres:12
    restart: always
    environment:
      - POSTGRES_USER=${TM_DB_USER}
      - POSTGRES_PASSWORD=${TM_DB_PASS}
      - POSTGRES_DB=${TM_DB_NAME}
    volumes:
      - teslamate-db:/var/lib/postgresql/data

  grafana:
    image: teslamate/grafana:latest
    restart: always
    environment:
      - DATABASE_USER=${TM_DB_USER}
      - DATABASE_PASS=${TM_DB_PASS}
      - DATABASE_NAME=${TM_DB_NAME}
      - DATABASE_HOST=database
      - GRAFANA_PASSWD=${GRAFANA_PW}
      - GF_SECURITY_ADMIN_USER=${GRAFANA_USER}
      - GF_SECURITY_ADMIN_PASSWORD=${GRAFANA_PW}
      - GF_AUTH_BASIC_ENABLED=true
      - GF_AUTH_ANONYMOUS_ENABLED=false
      - GF_SERVER_ROOT_URL=https://${FQDN_GRAFANA}
    volumes:
      - teslamate-grafana-data:/var/lib/grafana
    labels:
      - 'traefik.enable=true'
      - 'traefik.port=3000'
      - "traefik.http.middlewares.redirect.redirectscheme.scheme=https"
      - "traefik.http.routers.grafana-insecure.rule=Host(`${FQDN_GRAFANA}`)"
      - "traefik.http.routers.grafana-insecure.middlewares=redirect"
      - "traefik.http.routers.grafana.rule=Host(`${FQDN_GRAFANA}`)"
      - "traefik.http.routers.grafana.entrypoints=websecure"
      - "traefik.http.routers.grafana.tls.certresolver=tmhttpchallenge"

  mosquitto:
    image: eclipse-mosquitto:1.6
    restart: always
    ports:
      - 127.0.0.1:1883:1883
    volumes:
      - mosquitto-conf:/mosquitto/config
      - mosquitto-data:/mosquitto/data

  proxy:
    image: traefik:v2.1
    restart: always
    command:
      - "--global.sendAnonymousUsage=false"
      - "--providers.docker"
      - "--providers.docker.exposedByDefault=false"
      - "--entrypoints.web.address=:80"
      - "--entrypoints.websecure.address=:443"
      - "--certificatesresolvers.tmhttpchallenge.acme.httpchallenge=true"
      - "--certificatesresolvers.tmhttpchallenge.acme.httpchallenge.entrypoint=web"
      - "--certificatesresolvers.tmhttpchallenge.acme.email=${LETSENCRYPT_EMAIL}"
      - "--certificatesresolvers.tmhttpchallenge.acme.storage=/etc/acme/acme.json"
    ports:
      - 80:80
      - 443:443
    volumes:
      - ./.htpasswd:/auth/.htpasswd
      - ./acme/:/etc/acme/
      - /var/run/docker.sock:/var/run/docker.sock:ro

volumes:
    teslamate-db:
    teslamate-grafana-data:
    mosquitto-conf:
    mosquitto-data:
Next we’ll create the .env file.
Type sudo nano .env and paste in the code below. Replace the highlighted items (your domain, time zone, and email address) with your values. Unsure of how to enter your time zone? Click here.
.env
TM_DB_USER=teslamate
TM_DB_PASS=secret
TM_DB_NAME=teslamate

GRAFANA_USER=admin
GRAFANA_PW=admin

FQDN_GRAFANA=grafana.example.com
FQDN_TM=teslamate.example.com

TM_TZ=Europe/Berlin

LETSENCRYPT_EMAIL=yourperson@example.com
Once it’s pasted and customized, press control + x to exit, Y to save, Enter to save file
The last file we’re creating is .htpasswd which will be used to secure our server. This file contains a user and password for accessing TeslaMate via any browser (note this is NOT your tesla.com password).
Generate your .htpasswd on the web by visiting:
http://www.htaccesstools.com/htpasswd-generator/
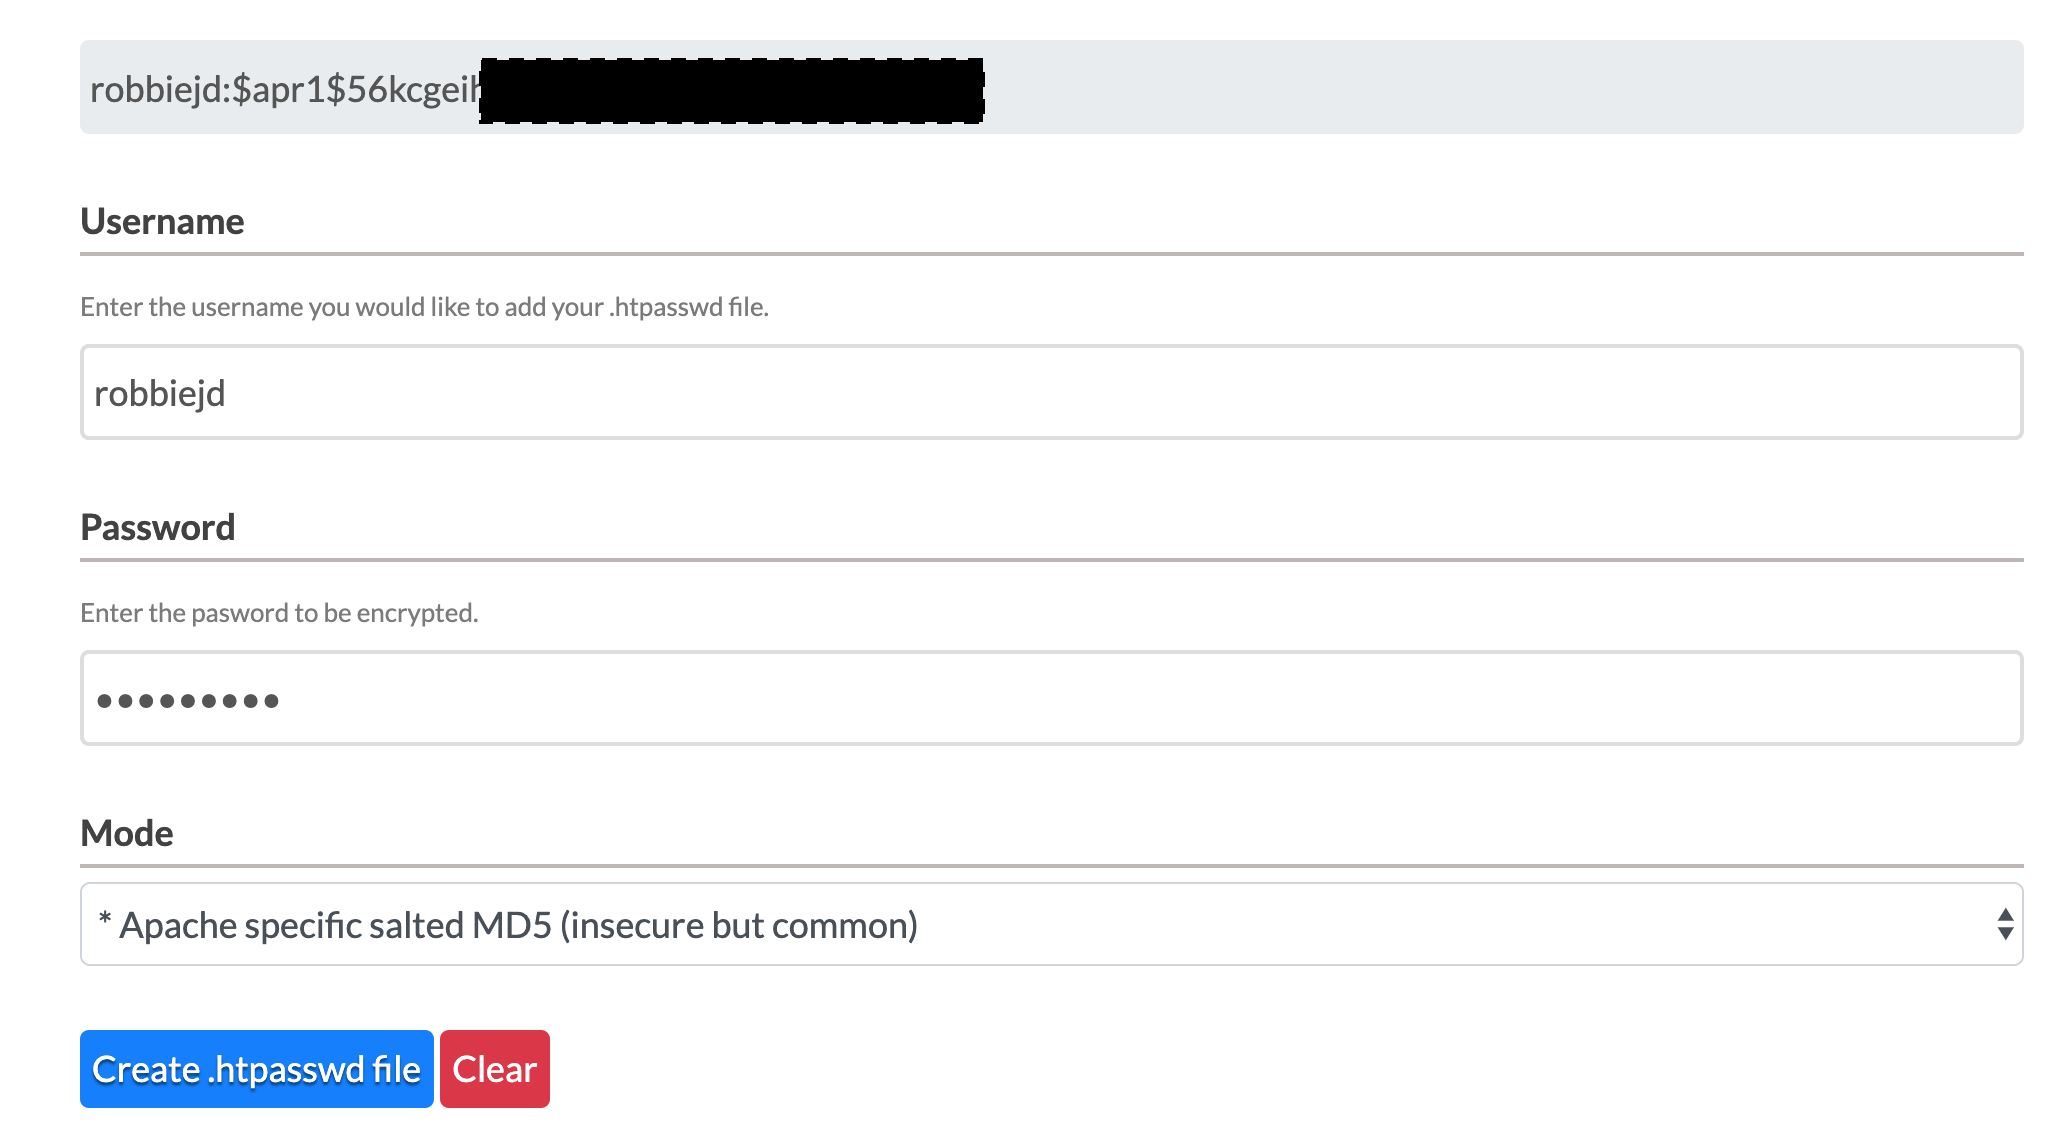
Select the Mode: * Apache specific salted… and press the Create .htpasswd file button, copy the text in the box that appears above the form. This is what we’ll paste into our .htpasswd file
.htpasswd
youruserhere:$apr1$0hau3aWq$yzNEh.ABwZBAIEYZ6WfbH/
Almost done!
Let’s tell Vultr about our new domain.
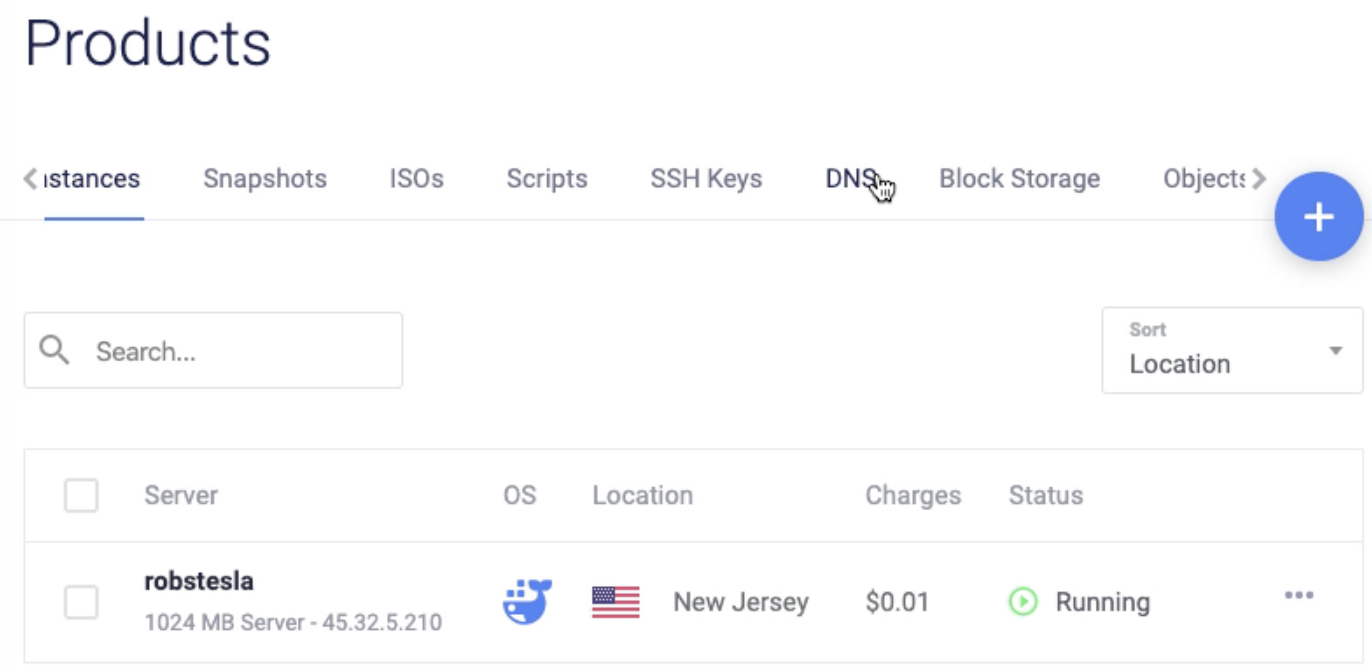
Let’s tell Vultr about our new domain. Navigate to the Products page and click on DNS
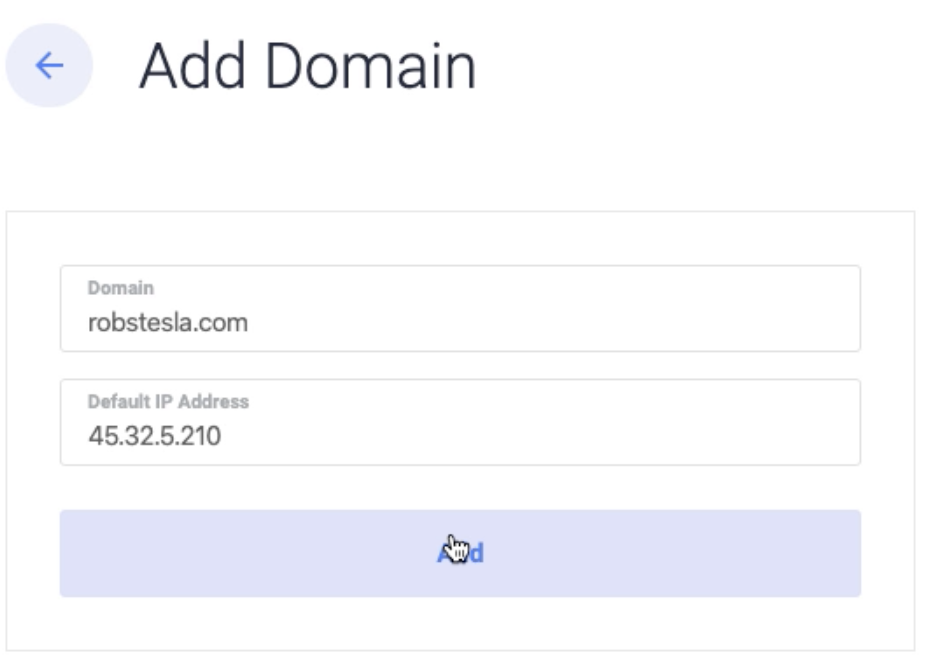
Add yourdomain.com and your Vultr server IP address (don’t include www). Press Add
We need a total of 4 A records added. The first has already been included which is rightfully blank. This record points to yourdomain.com. The second A record should point to www and the same IP address. Click Add Record.
The remaining two are grafana and teslamate. Go ahead an add those in as well.
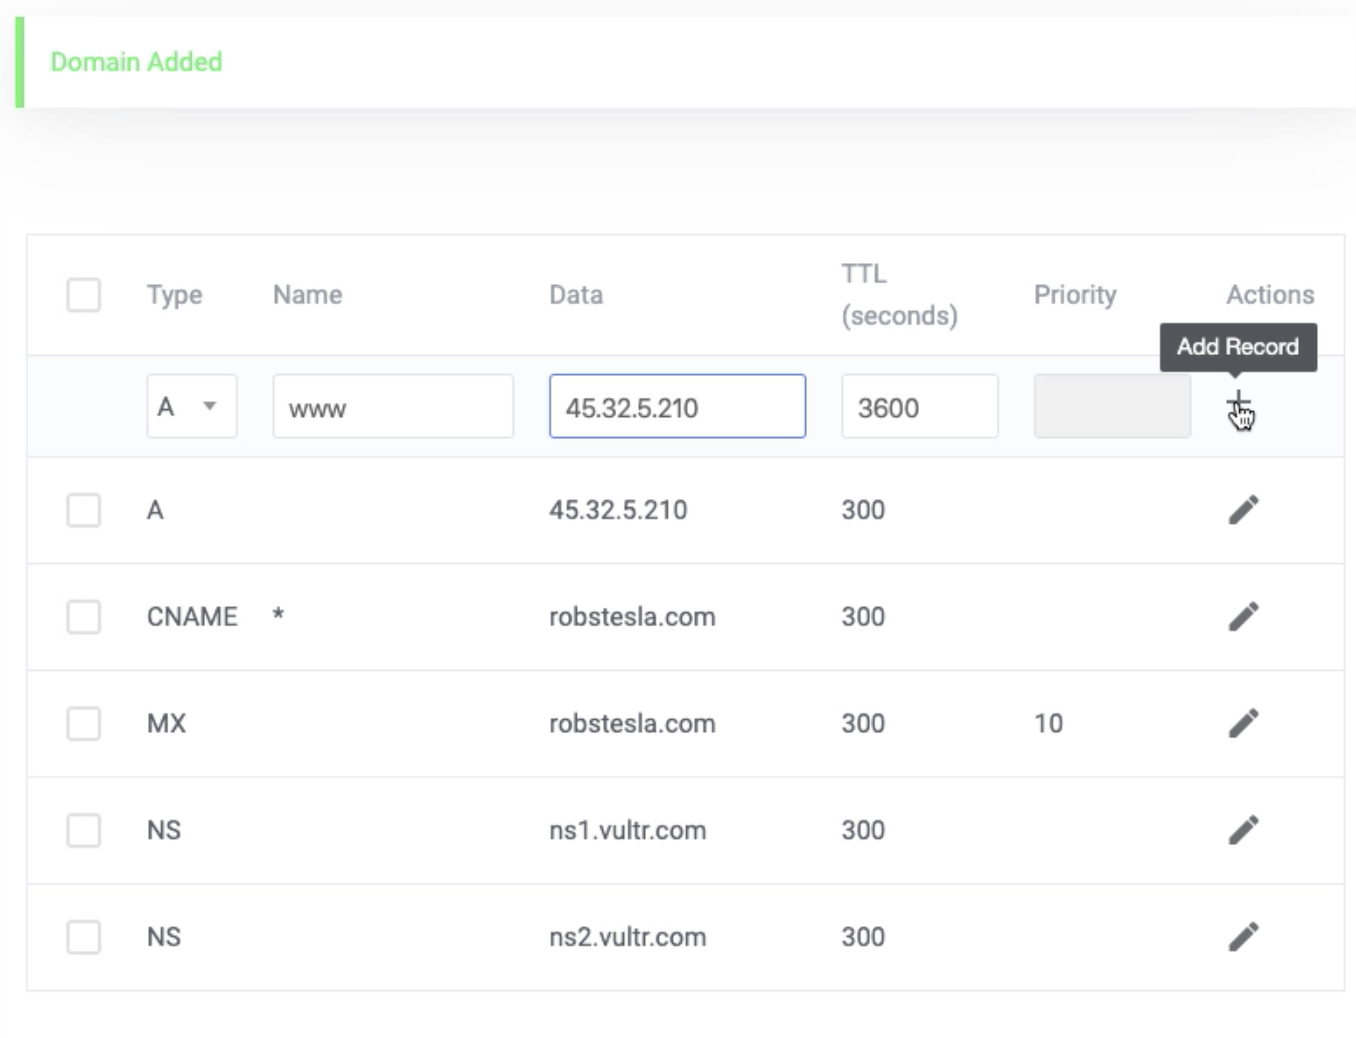
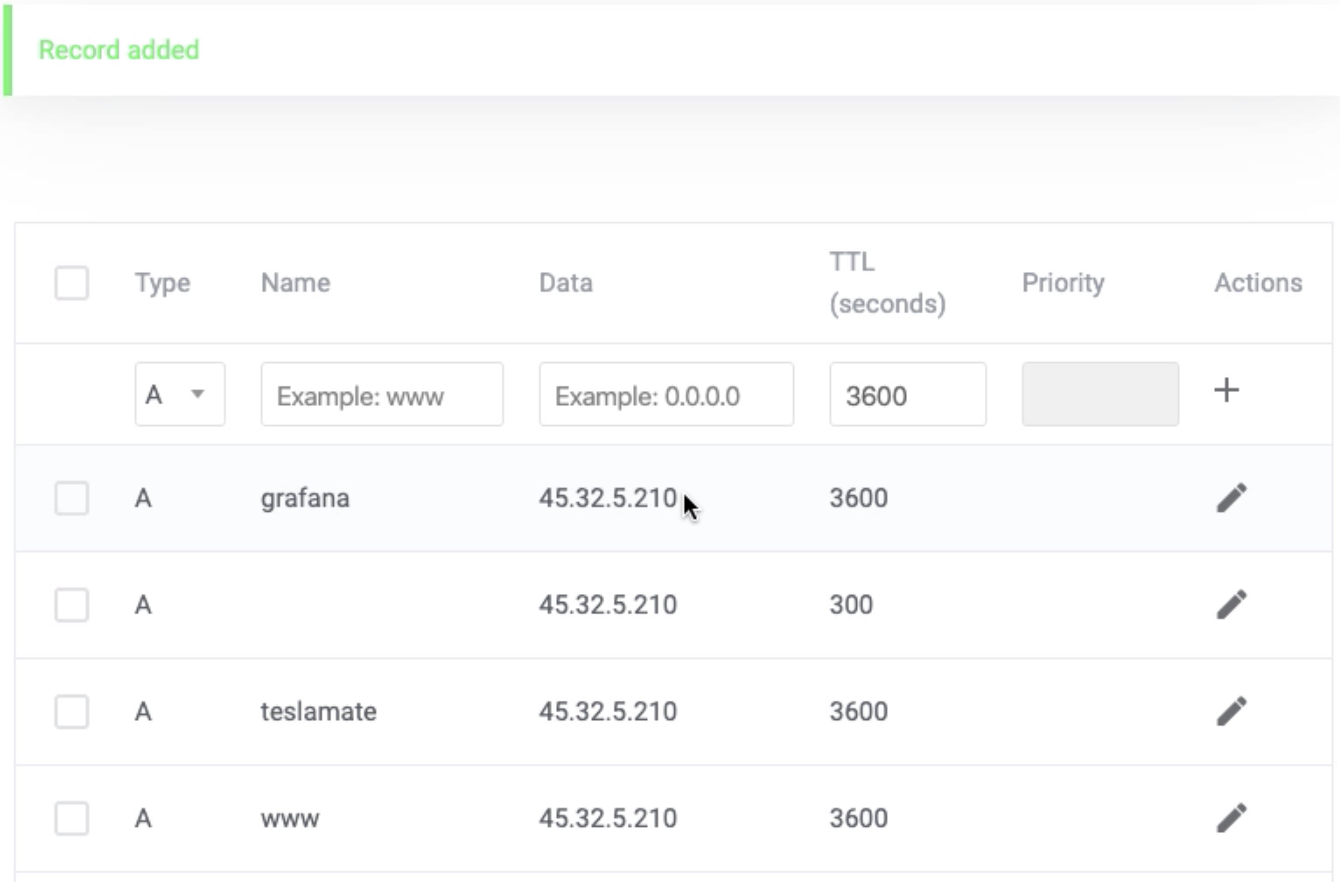
We’re all set with the DNS tab. We can head back over to our command line in either Terminal or PuTTy.
Now we can turn TeslaMate on:
Let’s make sure we have docker-composer installed by running the following command:
apt install docker-compose -y
When that completes, turn TeslaMate on by typing:
docker-compose up -d
Once that completes, let’s move onto the next section to login and configure TeslaMate
TeslaMate Config
Log into TeslaMate by visiting teslamate.yourdomain.com. You’ll be prompted for a username and password. This is where you’ll enter the values that you input to create the .htpasswd file. You’ll need to re-enter this whenever you try to access TeslaMate from a new device.
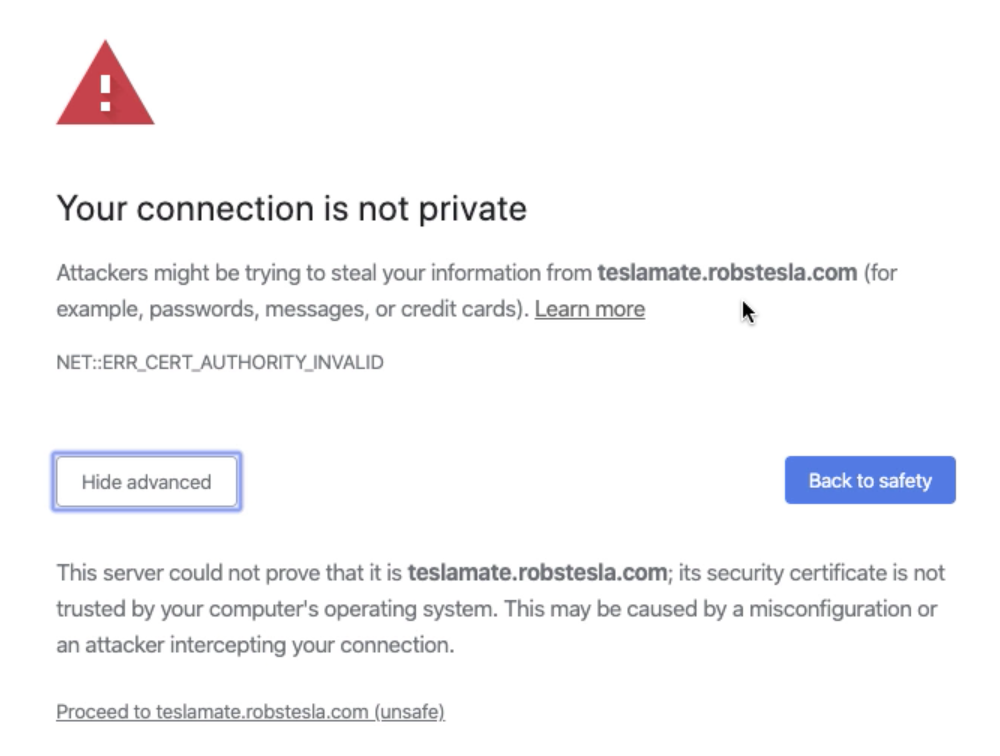
You may see this message. Not to worry, this is due to the recency of spinning up the server and matching up the SSL cert with your DNS record which can take sometime to propagate across the internet. This message only appeared when first launching the server and never popped up again. A few seconds later the logon prompt auto appeared.
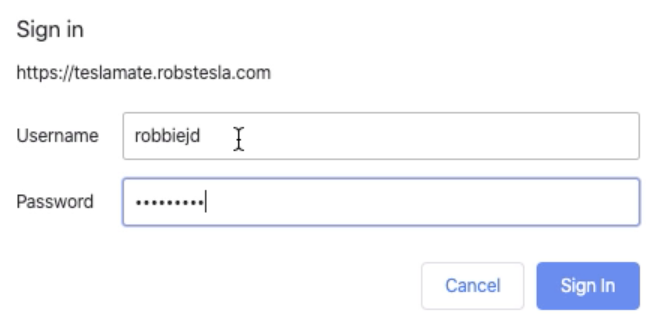
Enter the user and pass you input in the .htpasswd tool to create the long string of text
Next we’ll use our Tesla login to generate a token that TeslaMate will use to access our Tesla’s data. You’ll only need to do this one time and your password will not be stored.
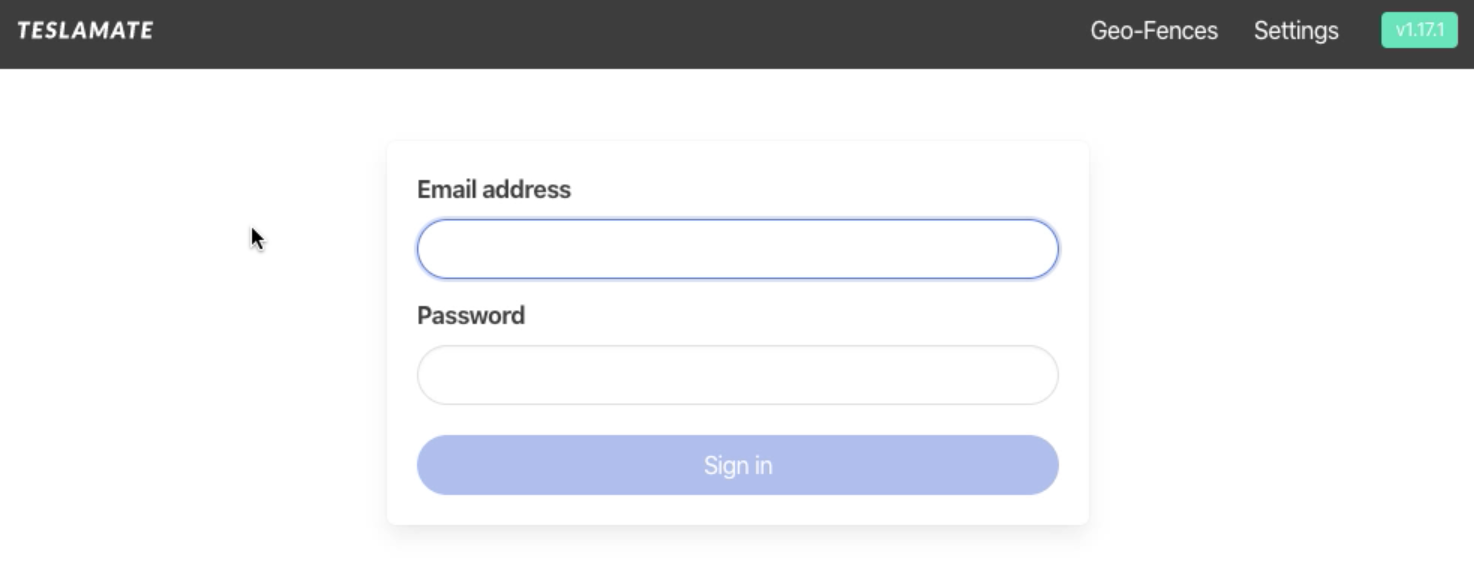
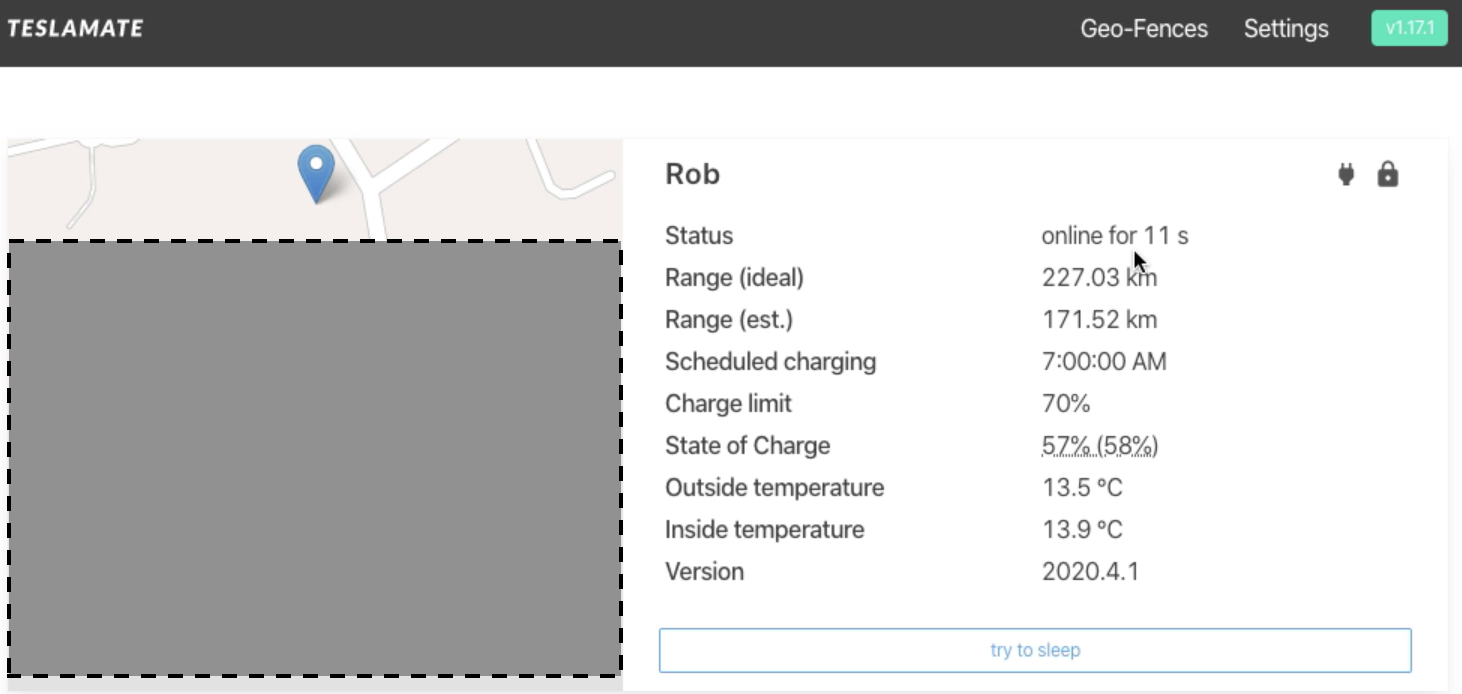
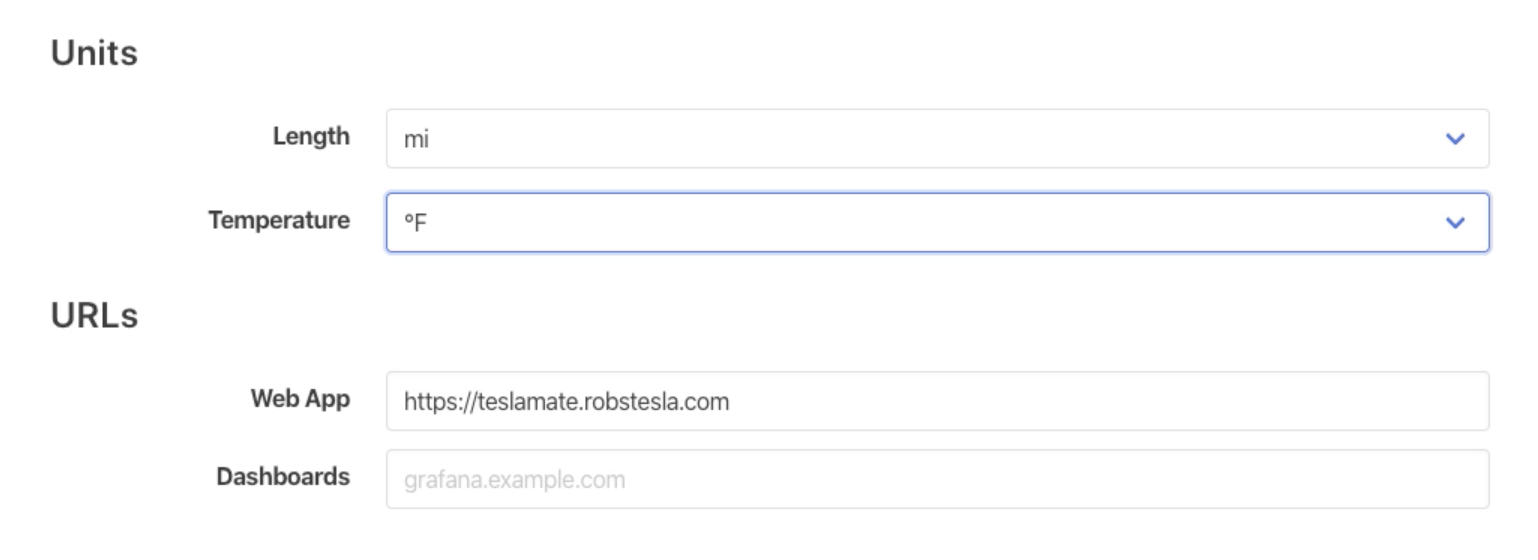
After you log in, go ahead and open the Tesla app on your phone to wake your Tesla up. After a few seconds you should see a current location along with additional stats. Depending on where you’re located, you may want to update km to mi and C to F. This can be updated within the Settings menu
Also make sure to add https://grafana.yourdomain.com to the Dashboards field at the bottom of the page so the dashboard menu item appears within TeslaMate
Next we’ll take a look at how to log into Grafana and view dashboards
Grafana Config
Navigate to grafana.yourdomain.com, the initial login is admin / admin. You’ll be prompted to change this password after signing in, go ahead and change it to whatever you’d like. In the future, you’ll continue to use admin as your user and the new password.
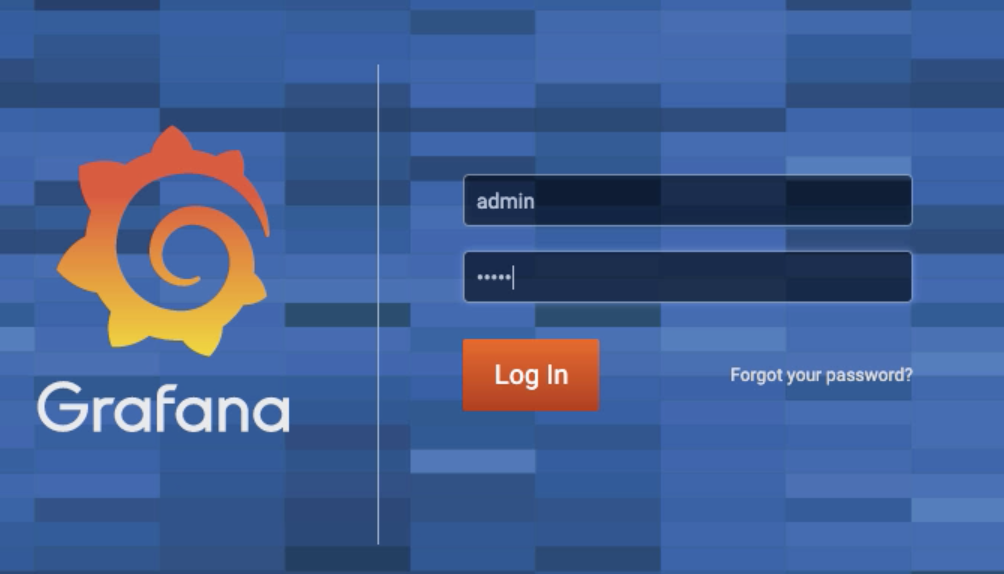
Your dashboards will look a bit barren until you start collecting some drive data. Let’s test that they’re working. Navigate to the Overview dashboard to see some basic info.
Navigate to Dashboards and Click Manage
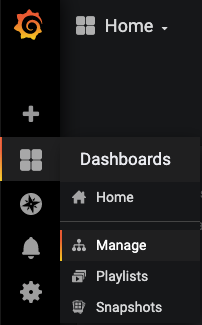
Click the TeslaMate folder
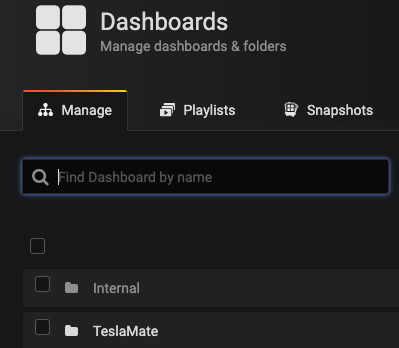
Click the Overview dashboard

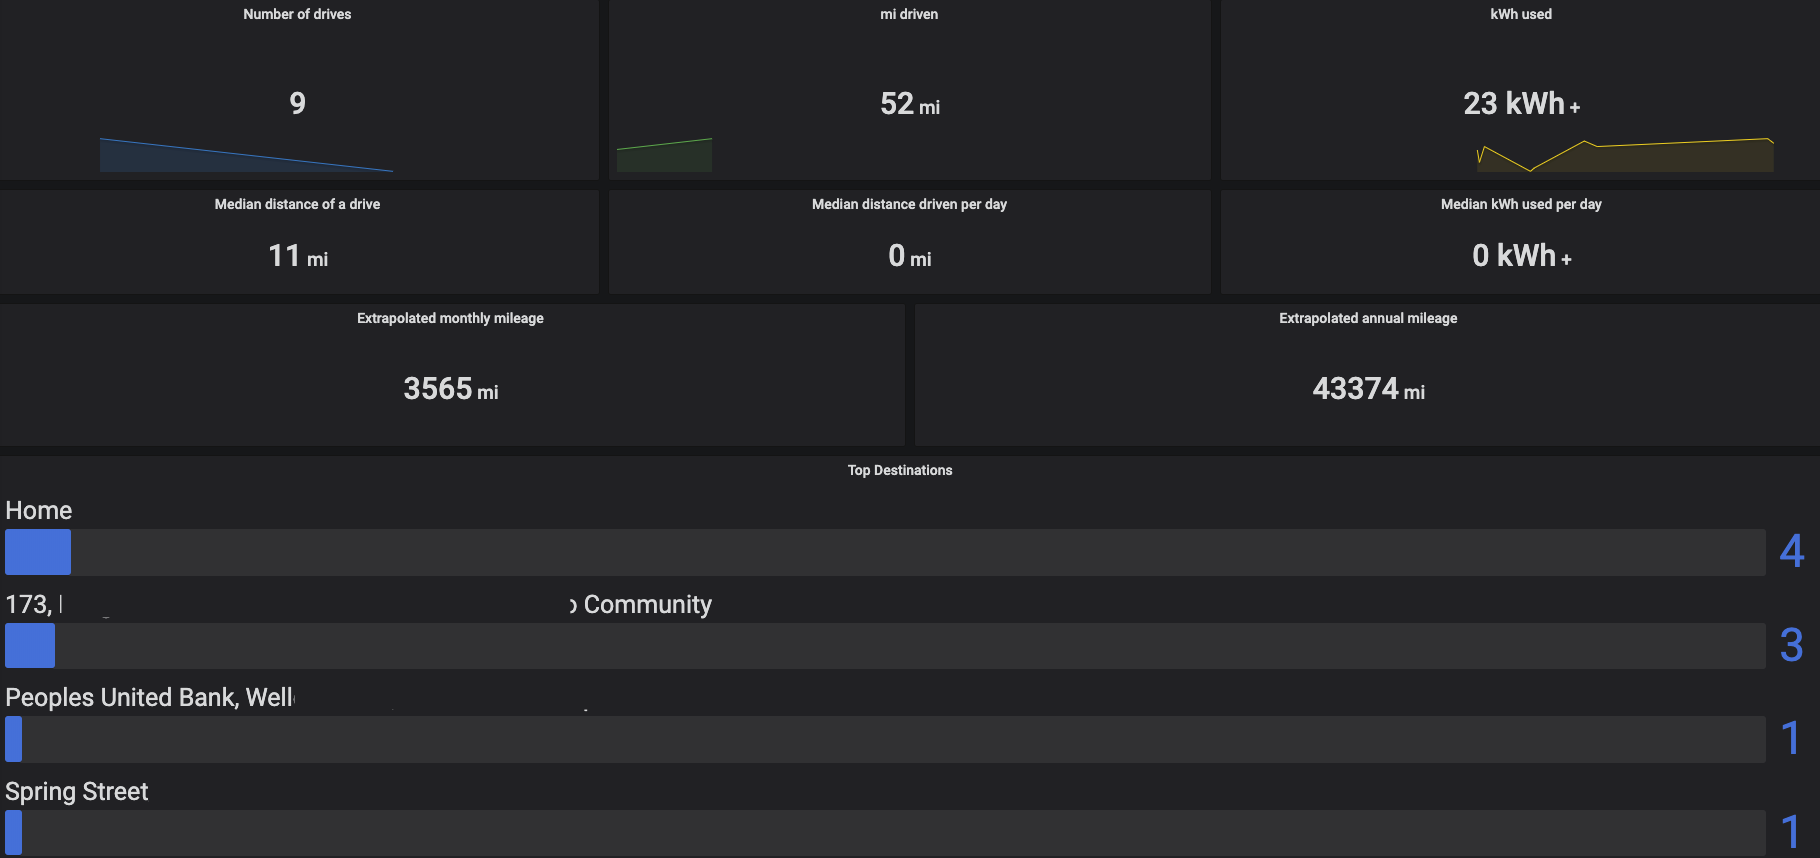
Looks good!
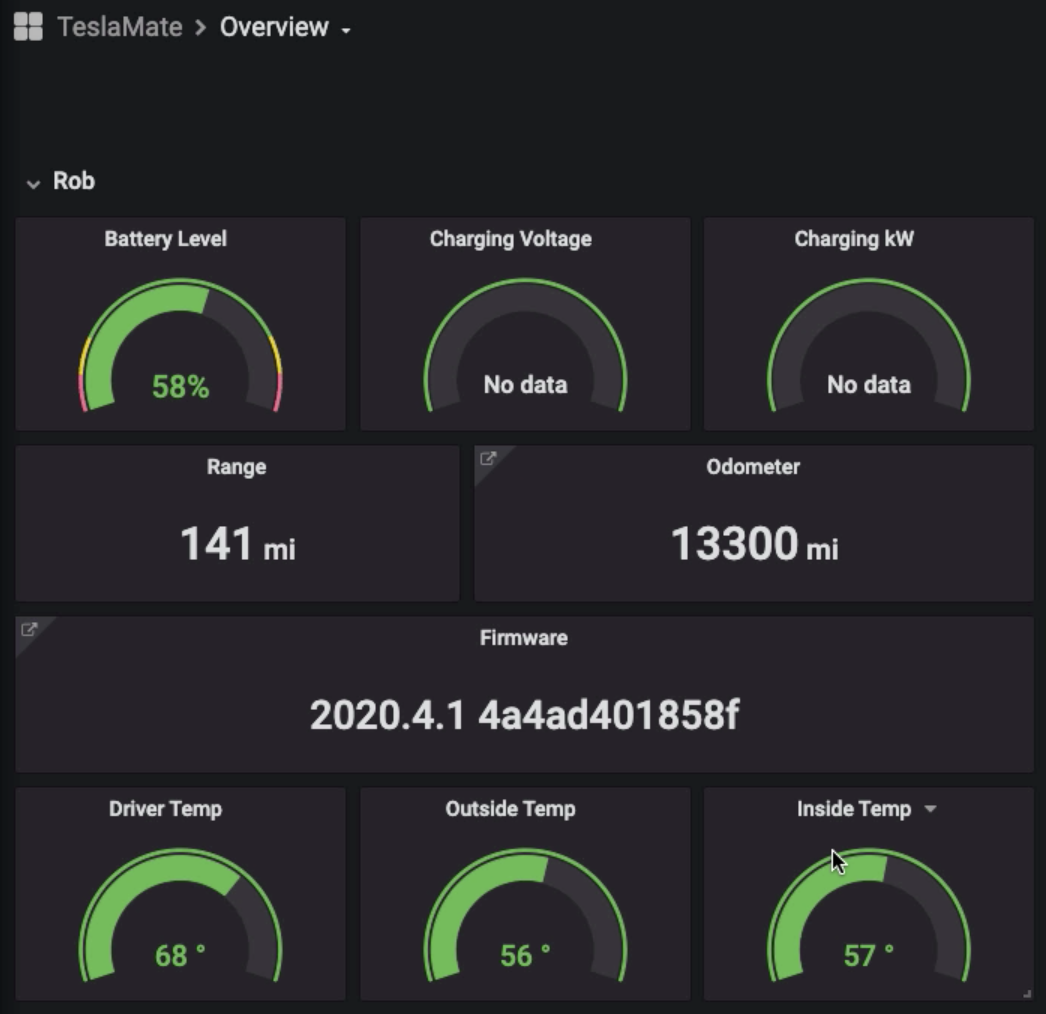 Feel free to explore all of the other dashboards to get a better sense for the kind of data that you can quickly visualize. Dashboards auto refresh and you also can toggle the time period you’re looking at at the top right of the screen. These look really cool on your Tesla screen. Also, if you’re feeling creative, you can customize your own dashboard(s).
Below I’ve linked some examples of what these dashboards look like after a couple of days of data collection.
Sample Dashboards
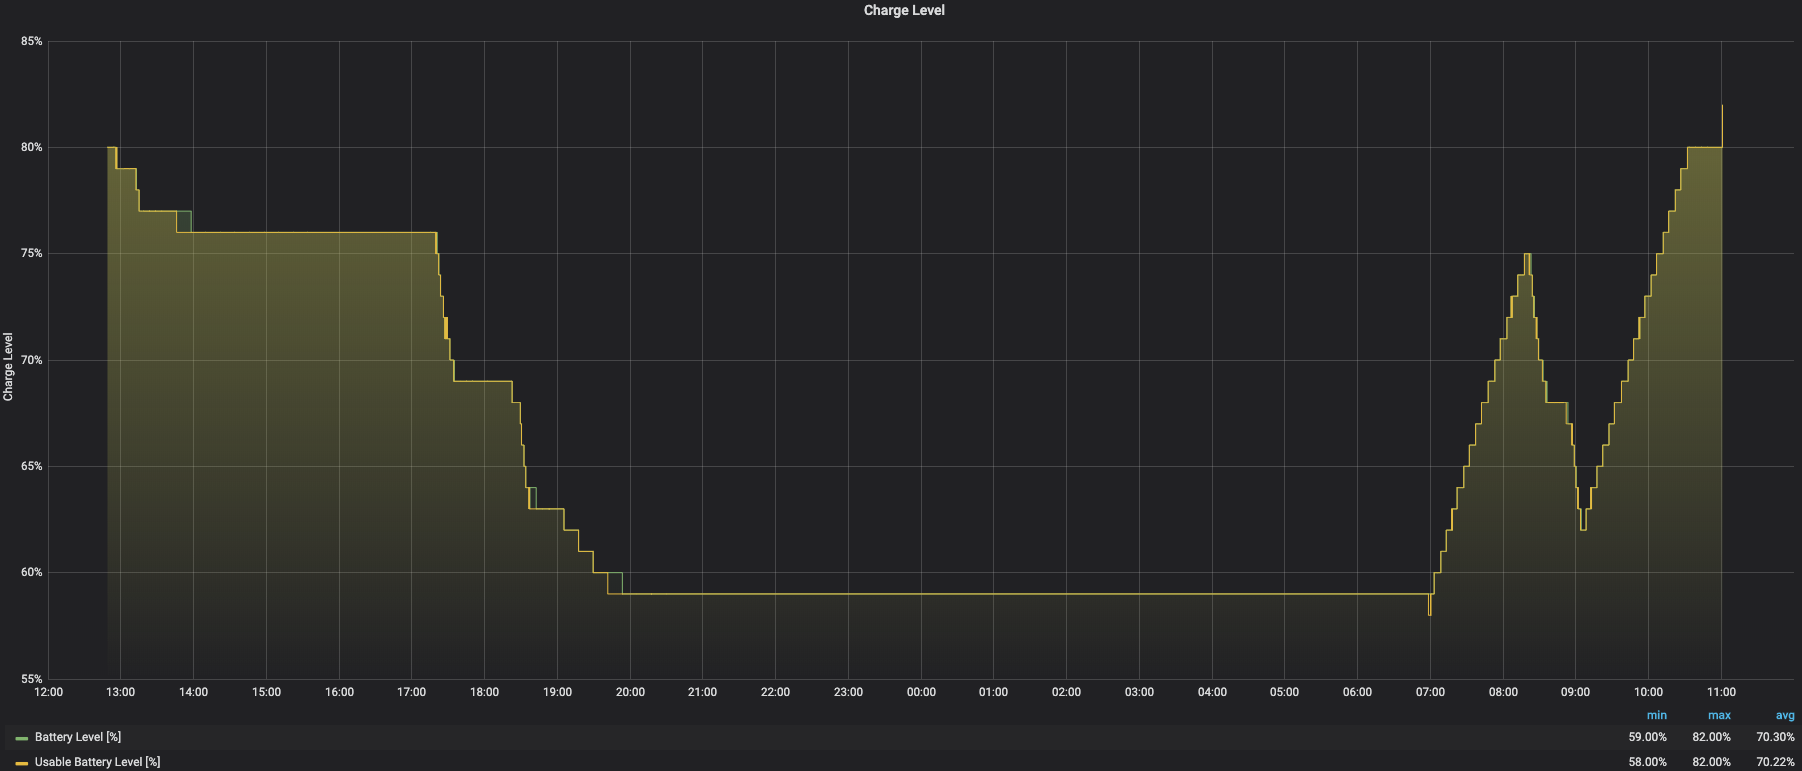
Charge Level
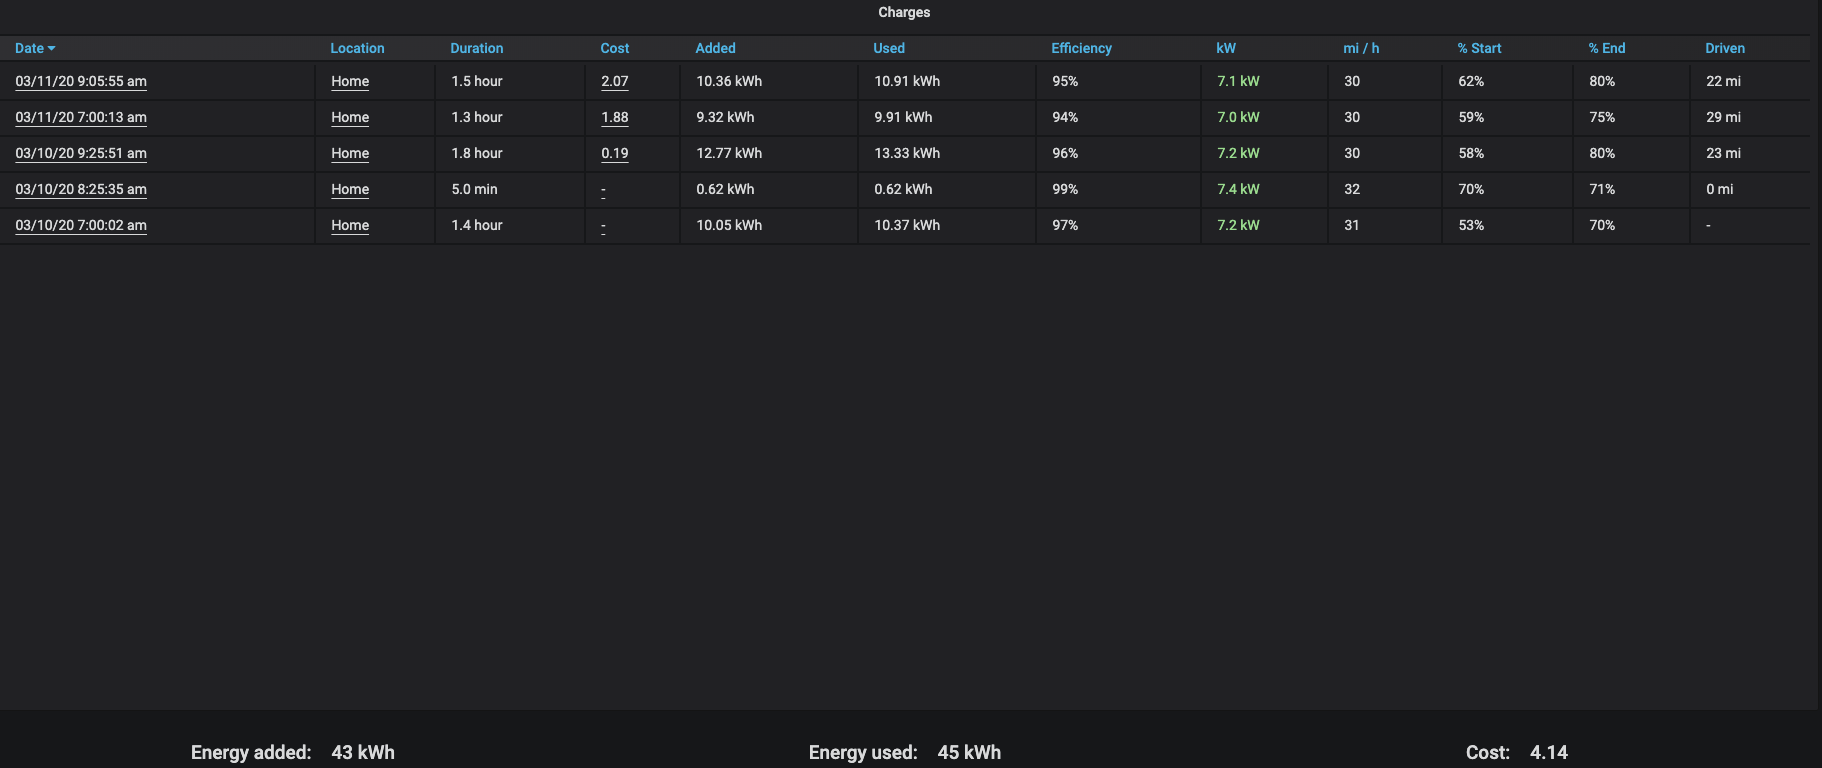
Charges
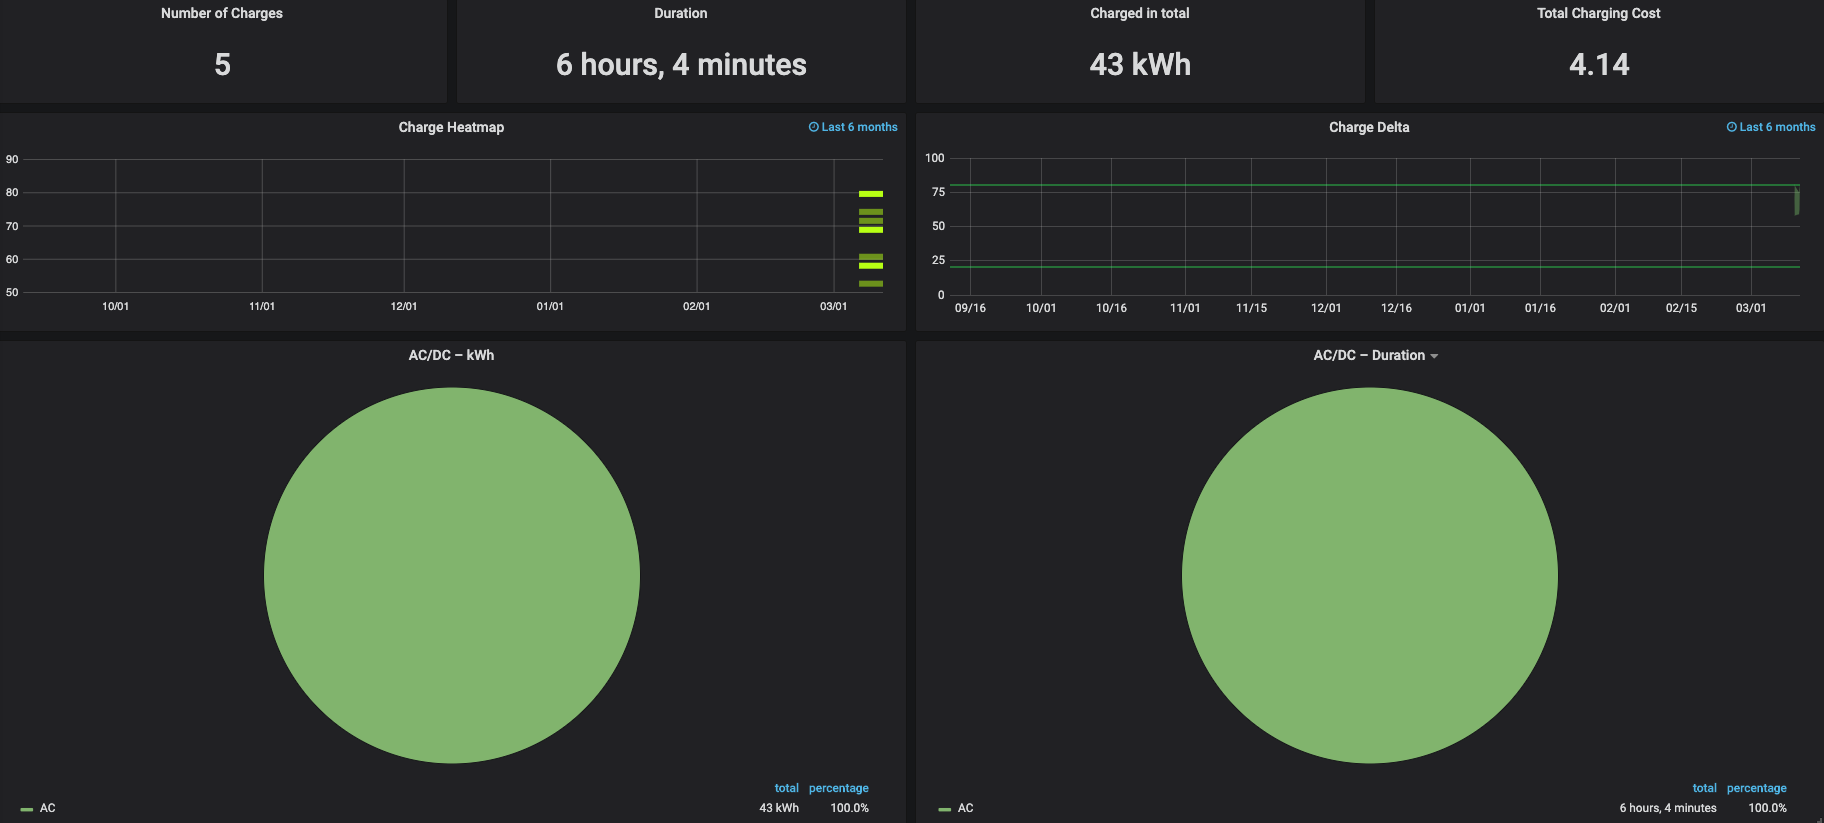
Charging Stats
This has only been collecting data for 48 hours, but you can start to see the charts coming together
Drive Stats
Drives

Where are you starting from and ending up? How long did the drive take, avg speed, distance? How was your efficiency? This is an awesome view for business travelers who need to log miles
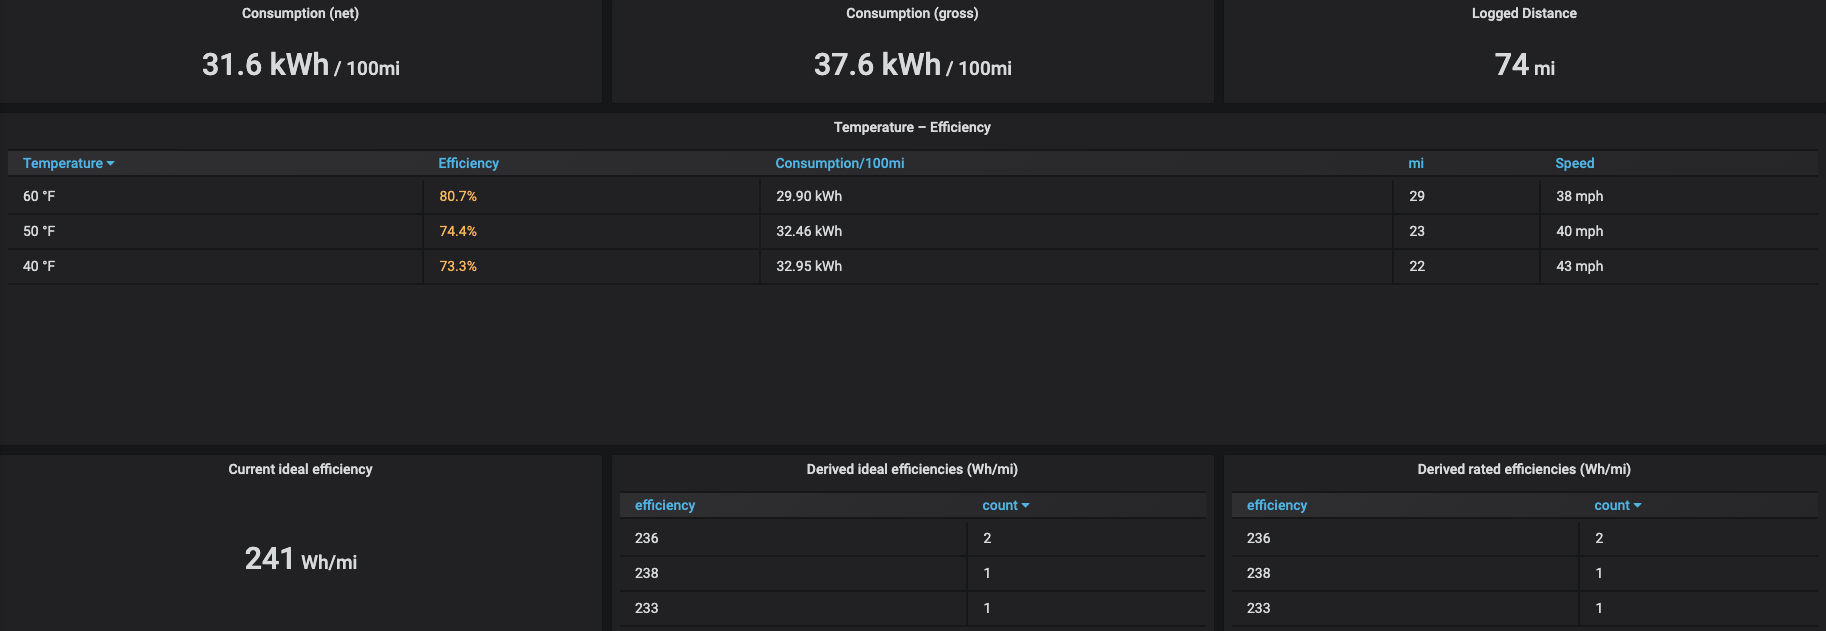
Efficiency
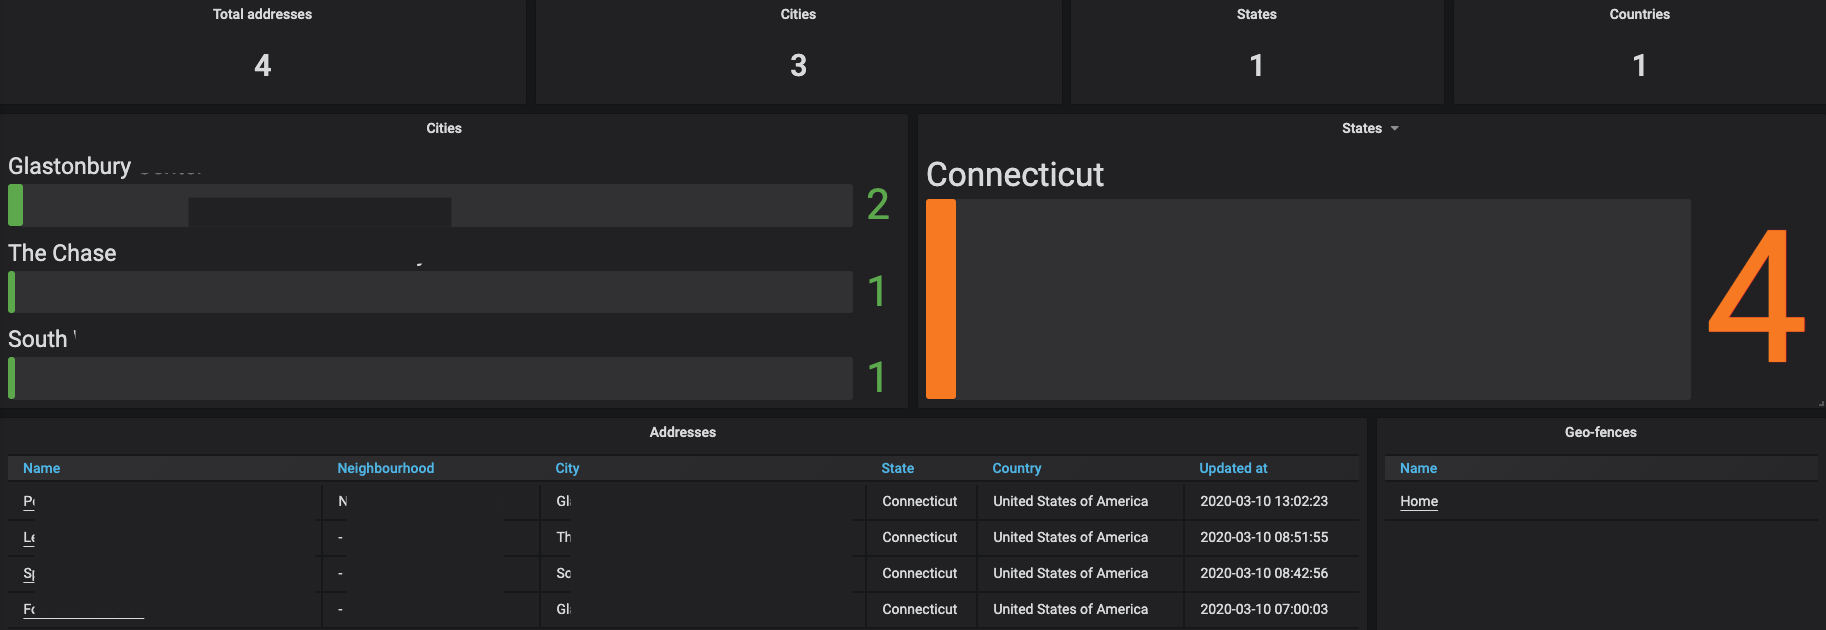
Locations
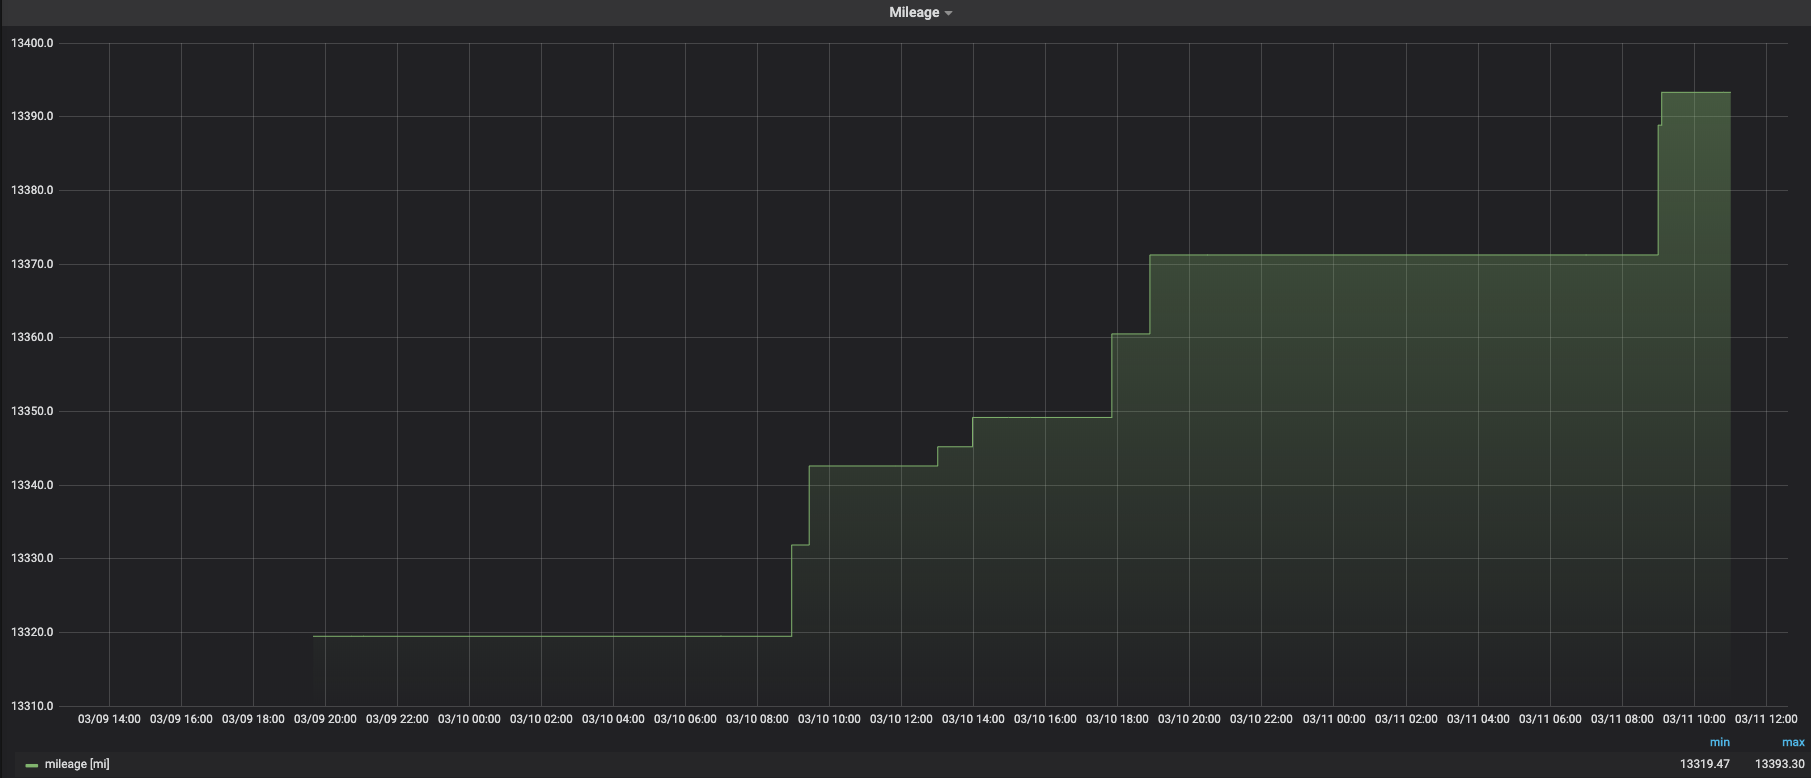
Mileage
Overview
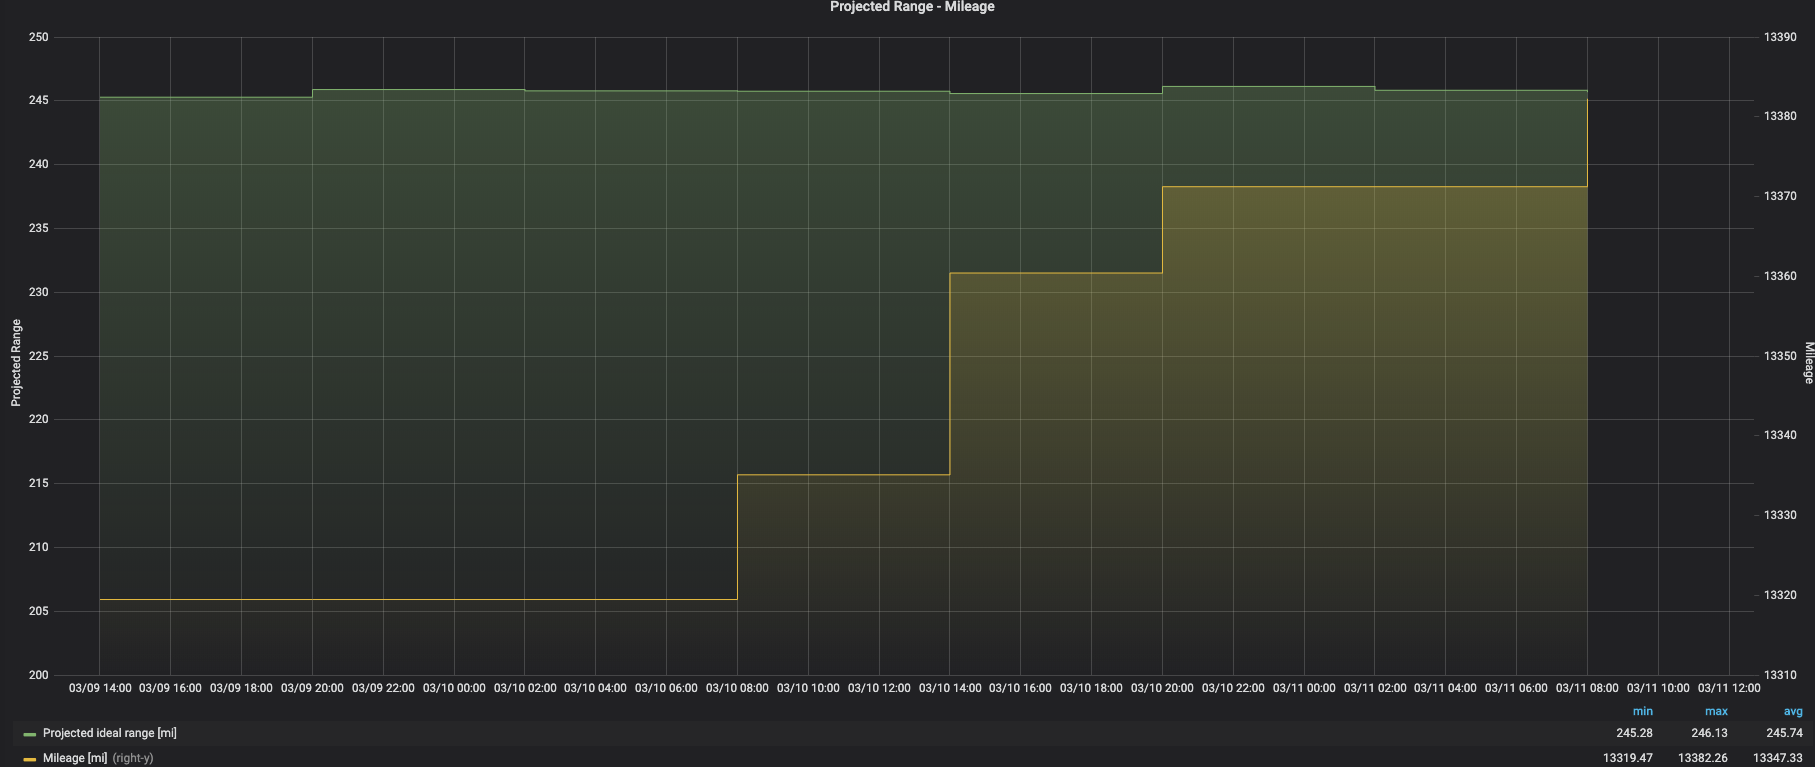
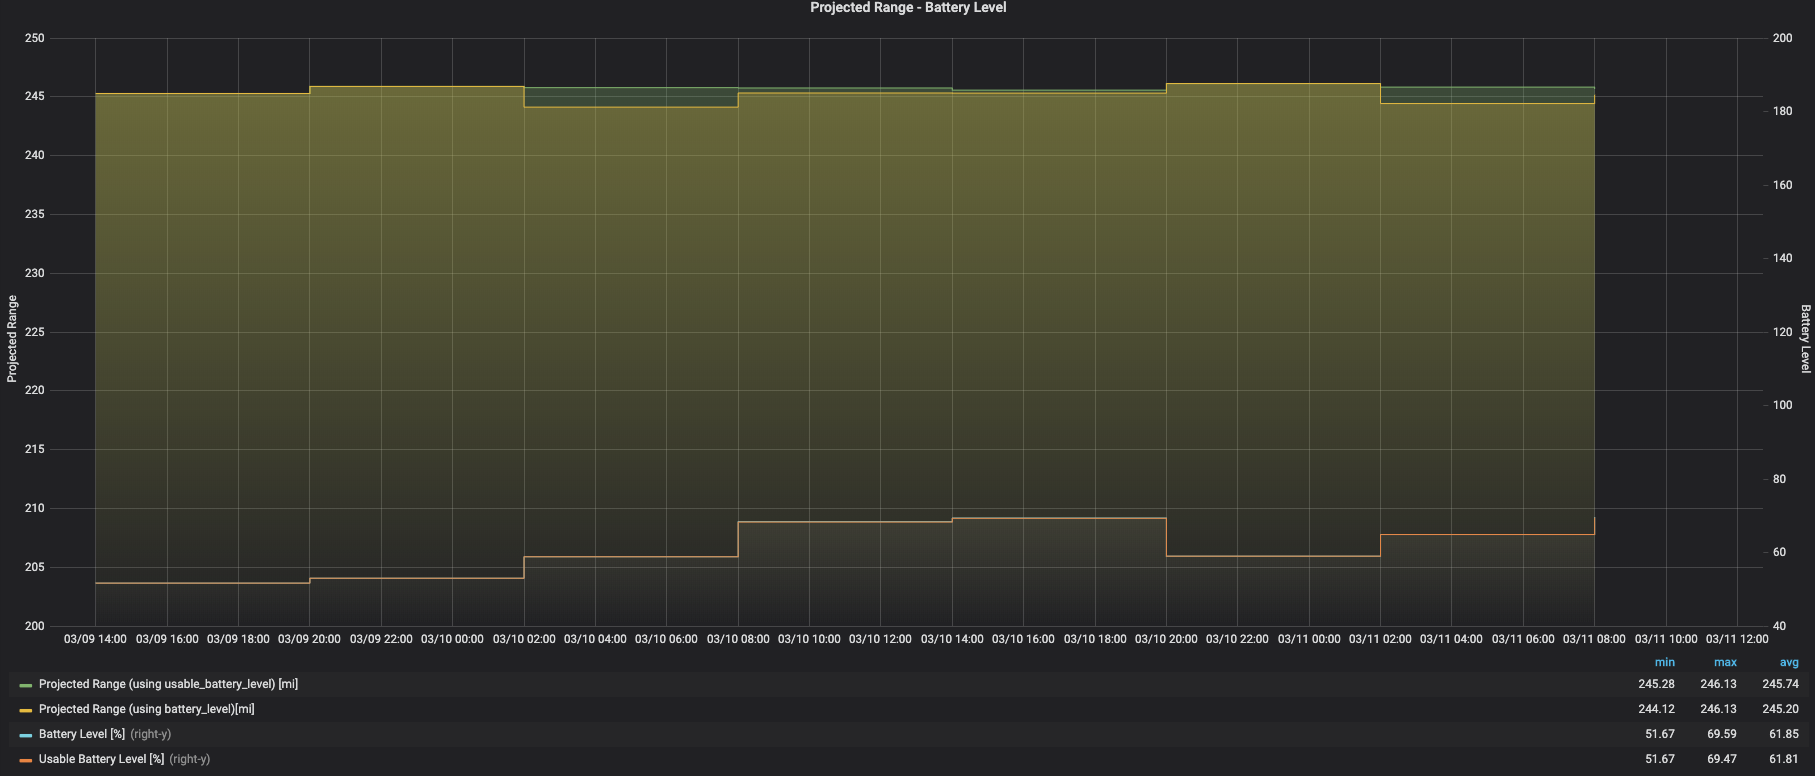
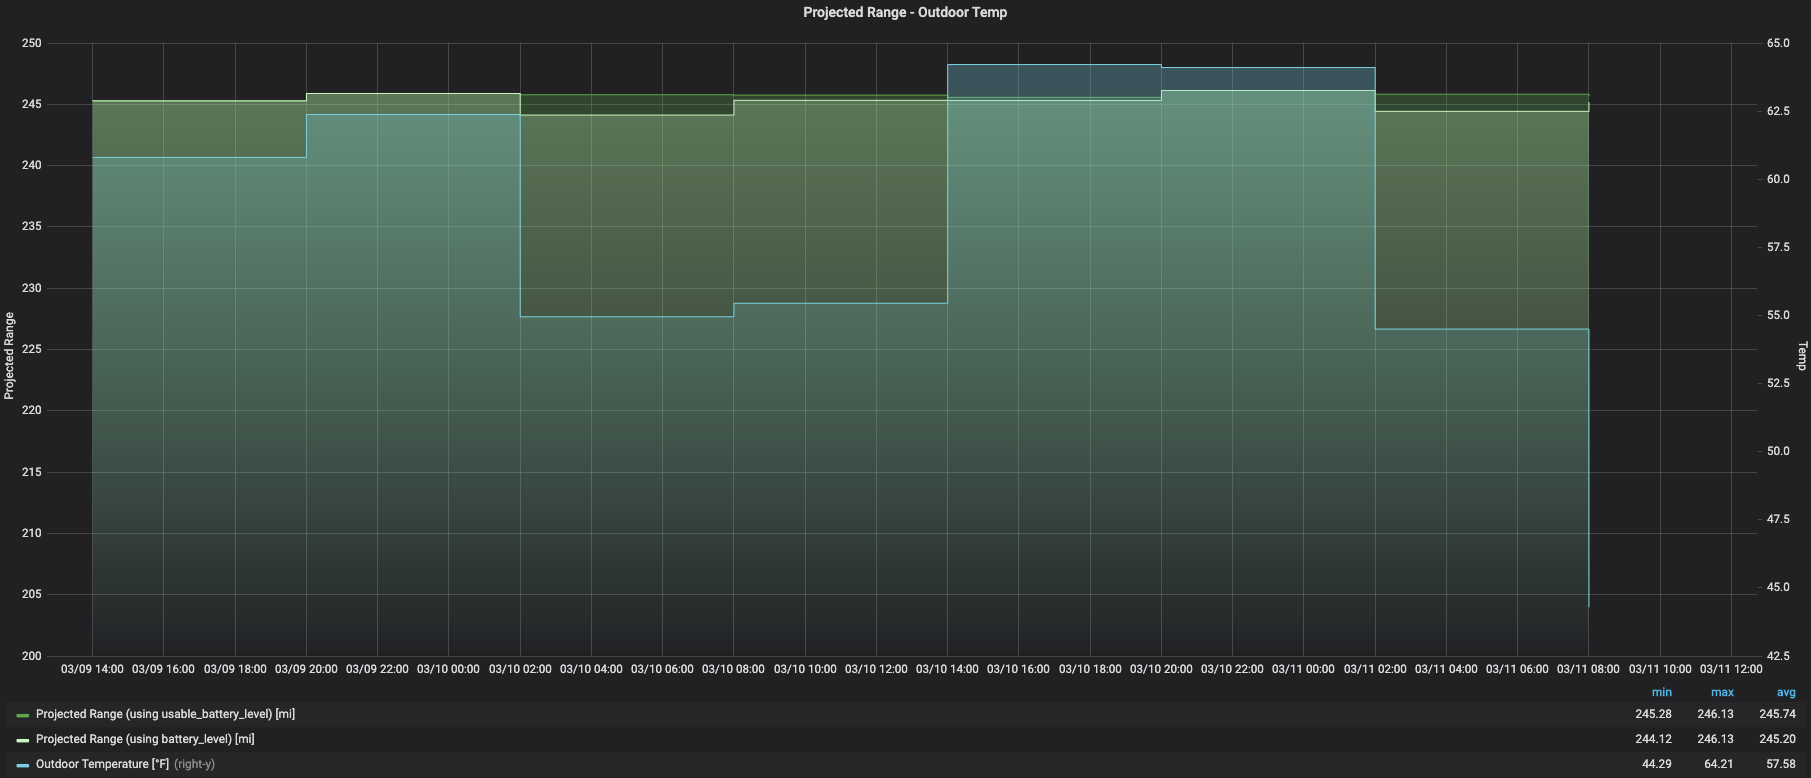
Projected Range – Mileage / Battery Level / Outdoor Temp
States

Over the past x # hours or days, what is the operational state of the Tesla? Is it parked, asleep, charging, driving? I can see why Elon want’s driverless cars. As you can see, my Tesla only spent 5% of the time driving (purple bars) and 95% idle.
Trip
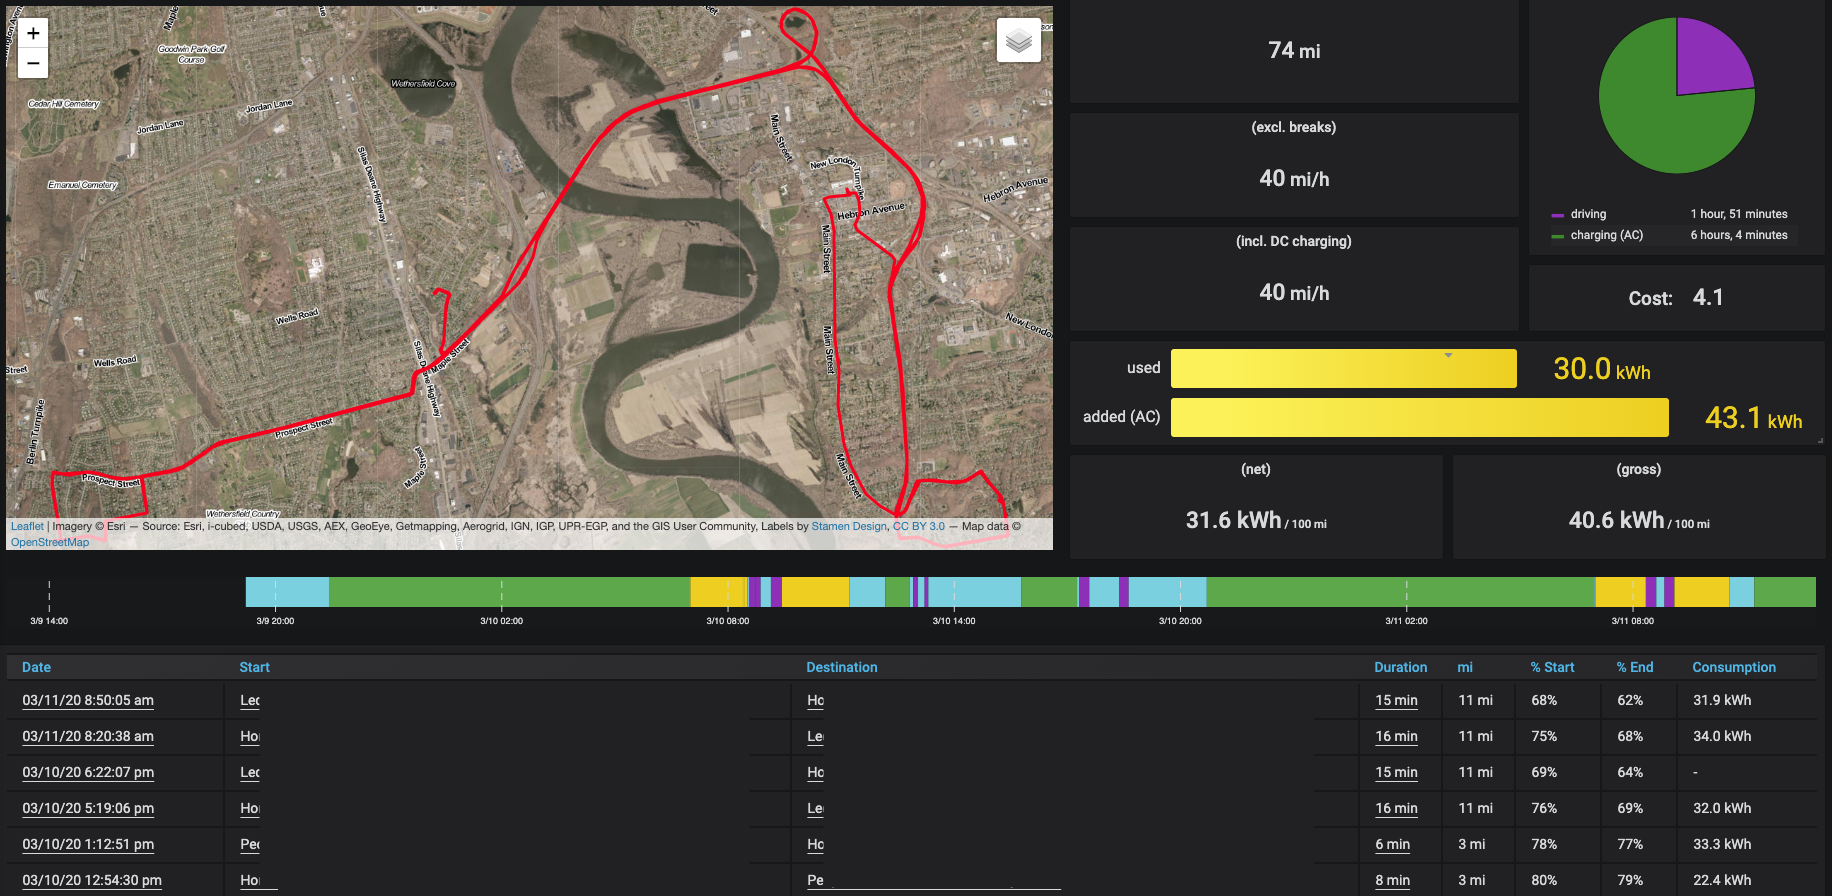
This is probably my favorite dashboard. In this example I’m filtering on the last 48 hours. The map graphically captures all roads traveled. The visuals on the right side pull out time driving vs charging, and how much power was used. Then we see a breakdown of the Tesla’s state (sleeping, driving, charging). Right below that are all of our individual trips.

At the bottom of the trips dashboard you’ll see where you’ve charged, how many kWh were added, and even elevation over time!
Updates
Vampire Drain
Visits
A giant map with all of your travel mapped out. This is the same map from the Trips dashboard but blown up to be full screen.
FAQ
What does it cost ?
You’ll only need to pay for hosting of your private server which is $5 / mo and a domain name.
Use this link for $100 account credit
No longterm commitments. You can delete your TeslaMate server anytime
Is it safe ?
Yes! Your Tesla login credentials are not stored on any server and are only required during initial set up to generate a token. All of your the data logged from your Tesla will be securely stored on your private server.
Dashboards ?
Out of the box, TeslaMate includes beautiful dashboards to visualize all things data in regards to your Tesla. You can even create your own custom dashboards!
How does this compare to teslafi ?
I prefer TeslaMate for the interactive and intuitive dashboards, privacy (no one can see your data but you), and more modern look and feel.
Realtime Data ?
TeslaMate provides you with realtime metrics and dashboards that you can pull up on your Tesla’s screen, mobile device, or laptop
Historical Data ?
All of the data captured by TeslaMate will be accessible and can easily be trended starting from the moment it’s turned on.
How long does teslamate take to install ?
End to end it shouldn’t take more than 30 minutes to start capturing data from your Tesla. We’ve created a tutorial that steps you through the entire set up process. No coding experience or technical chops required.
Other uses ?
Great for business as TeslaMate automatically tracks location, duration, trip mileage, and more. All you have to do is drive. You’ll also be able to better diagnose any battery / range abnormalities. Realtime location tracking from the web.
Can I Imort my data from Teslafi ?
Yes! Click here to learn how to import your TeslaFI data into TeslaMate
502 Bad Gateway Error
If you encounter a 502 Bad Gateway error when trying to access teslamate.yoururl.com this can quickly be resolved by rebooting your server. Type sudo reboot. Once your server is back online, your URL should now work without issue.
Updating
Updating to the latest version of TeslaMate is simple
If you’ve just installed TeslaMate, you’re already on the latest version. If it’s been a few months you may want to check for and install the latest version.
—
Take a vultr server snapshot (optional). Before updating, you may want to take a snapshot of your server to serve as a backup you can easily recover from in the event anything goes wrong. Taking a snapshot is simple and can be performed via your vultr portal. Snapshots are a good way to cover yourself just in case and can be deleted (or stored) after you’ve verified the new updates are working and you don’t need to rebuild your server from a backup copy. Feel free to take a snapshot prior to running the update commands below, or just skip this step.
—
This update process is simple (under 5 minutes) and only requires two commands on your server:
docker-compose pull
Will pull the latest version of TeslaMate. Then all you have to do is activate it by typing:
docker-compose up -d
Once that completes, test access to both your grafana and teslamate URLs. If you encounter a 502 bad gateway error just restart your server by typing:
sudo reboot
Should be all good now!





can you host this on a stand alone computer or VM without domain?
Yea, you can host it locally on your network. You can only access it when you’re on your network though. You won’t be able to access it outside of it (without doing a lot more).
How is .env setup to view it locally without a domain name I get 404 error when I go to my server IP after I set up
I’m trying to import TeslaFi data into teslaMate. I followed the instructions as posted but I don’t get the import screen when I restart TeslaMate, Accessing TeslaMate admin I only see the car summary screen. Any ideas?
I’m was and running in 25 minutes following these instructions. Great!
Next step is to import TeslaFi Data, but I have a gap in my TeslaFi data of about 3 weeks. Would the discontinued data cause any issues with the various analyses?
Hi there,
I followed all of the steps, but when launching the following command:
docker-compose up -d
I am getting the following error:
ERROR: yaml.scanner.ScannerError: mapping values are not allowed here
in “./docker-compose.yml”, line 5, column 10
Total black magic to me and any help would be appreciated 🙂
Hi – I get an error when trying to browse to my teslamate domain. I have set it up all correctly and can bing it from my local Mac. the grafana domain works fine. Any ideas?
In the UK we can have multiple rates for electricity depending on the time of the day. Could this be added to the geofence?
teslamate.[mydomain].com is not showing as HTTPS, but HTTP, with warnings. Has something changed? Otherwise, I’m at the Tesla account credentials screen, I’m just not going to enter them until this is fixed. Thanks
same issue 06/2022
I have a Model S and my wife has a model X, they are both on my account.
When I set up the TeslaMate part of the process, it sees both cars. But when I go to the grafana section, I can’t see how I would tell it which of the two cars to actually graph.
Am I missing something, or does this not support multiple cars?
Great tutorial… I had a lot of fun setting that up and it is working nicely!
Thank you so much for doing that!
Stephan Lacasse
Montreal, QC, Canada
I followed your directions but when trying to login to teslamate @ teslamate.adamstesla.com it just keeps endlessly refreshing. I was able to login to the site itself. I’m stuck at the screen where I would login to my tesla account for a token. It does allow me to go to settings or geo fence but the site is still constantly refreshing. I have tried on multiple browsers, devices and internet connections. Any ideas what my issue might be?
HI
Thanks for the amazing product. I would like to put it into a homepage to show the dashboards more elegant. But I need to make changes to the grafana.ini file to do that. I just cant find the damn file 🙂 How do I make changes to the Grafana.ini file in this install?
Hi.. the earlier question about an account with 2 tesla’s on it. I have the same issue. Is there an answer to it?
Netflix not working in my car
No matter how hard I try I continue to get a 404 page not found. I can get into grafana fine, but not teslamate. Can someone help? I am very new to all of this. Thanks!!
Keep getting the https certificate error. any idea what I did wrong because its not showing as secure.
Once I installed everything, I then try to open the teslamate.domainname.com, I see this warning message. To ensure that your Tesla API tokens are stored securely, an encryption key must be provided to TeslaMate via the ENCRYPTION_KEY environment variable. Otherwise, a login will be required after every restart.
The automatically generated encryption key used for the current session can be found in the application logs.
For more information, see the updated installation guides on docs.teslamate.org
I then see it is waiting for Access token and refresh token for sign in. It doesnt ask me for Tesla login.
With information “Obtaining tokens through the Tesla API requires programming experience or a 3rd-party service. Information can be found here.” Where do I add the Encryption_key?
I see the ENCRYPTION_KEY should go into docker-compose.yml and I have to run an update command. Any idea where I can generate the secret key?
Hi there,
I am able to see the data in the grafana dashboards now.
Thanks for your tutorial.
My follow on questions:
How do I connect to the db locally so that I can export the data from the tables to a csv file?
Thanks for your tutorial.
My follow on questions:
How do I connect to the db locally so that I can export the data from the tables to a csv file?
The tutorial did help and I am able to see dashboards with data. But now I want to extract the data to a file
Can you share a command to connect to the teslamate db? I would like to extract my data please